
How heatstitch works
heatstitch opens embroidery files, shows how the machine sews them, checks them for your fabric and lets you change everything: the order, every object, every stitch. From pictures, drawn shapes and text it makes new designs. Everything runs in your browser, and your files stay with you.
To watch: short videos Each shows one way through the app in two to three minutes, spoken in German with English subtitles; each stands on its own. All videos by topic
-
Part 0 The heatstitch interface
-
Part 1 A new embroidery design
-
Part 2 Lettering
-
Part 3 From a picture to a design
-
Part 5 Objects and sequence
-
Part 6 Opening a finished embroidery file
-
Part 7 Checking an embroidery file
-
Part 8 Fixing and comparing
-
Part 9 Jumps and trims
-
Part 10 Preview and saving
-
Part 11 Fills
-
Part 12 Satin and lines
-
Part 13 Shape and single stitches
What would you like to do?
- See how an embroidery file is sewn: colors, order, jumps, with a player.
- Check whether a design will stitch well on my fabric, and have it fixed.
- Sew an object differently: pattern, decorative ones too, spacing, underlay, border, satin width, fringe.
- Change the order, cut a fill apart or set trims.
- Draw a shape or sew a name; decorate lines: bean stitch, zigzag, motifs, echo, shadow.
- Turn a picture, logo or SVG into a design.
- Know which stabilizer and needle I need, pick threads of my brand, print the stitch sheet.
- Save for my machine: PES, DST, JEF, VP3, EXP or PEC, in the right hoop.
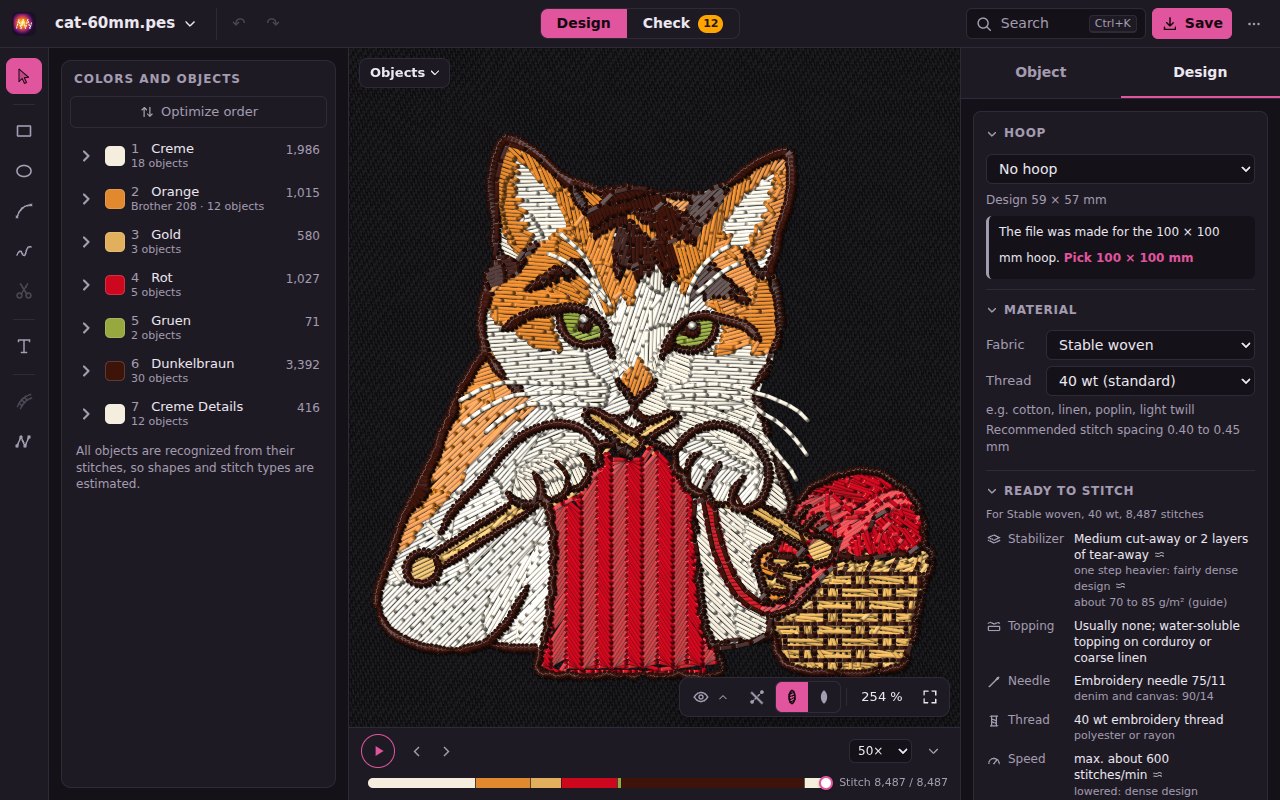
Quick start
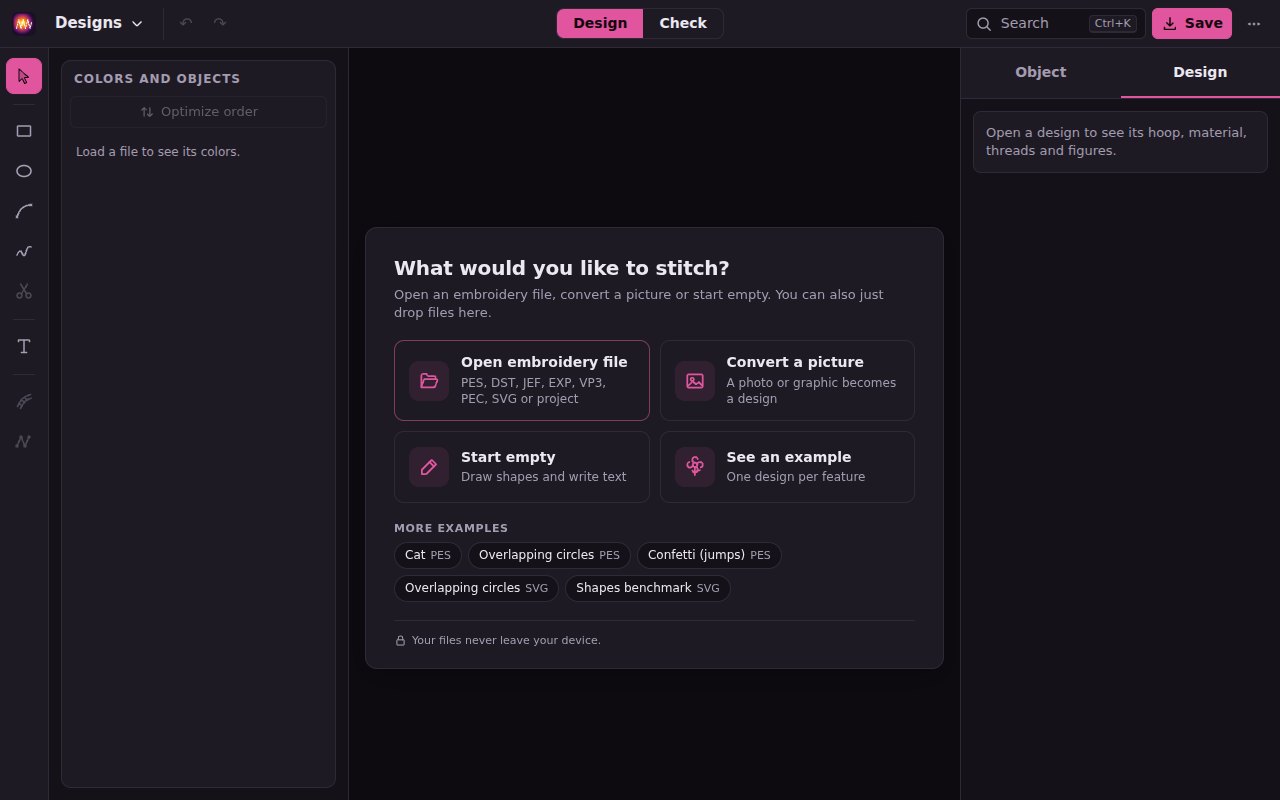
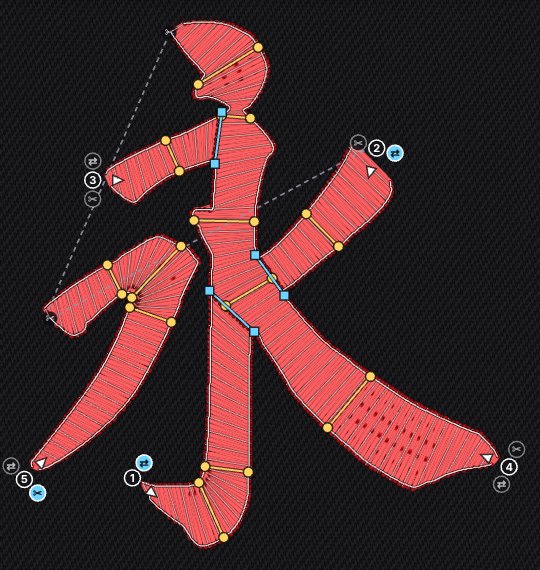
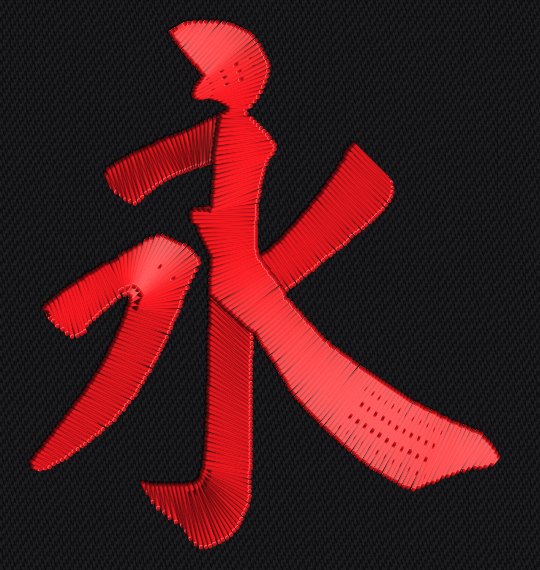
- The start page asks What would you like to stitch? Drop an embroidery file on the window or pick Open embroidery file: PES and PEC (Brother), DST (Tajima), JEF (Janome), VP3 (Pfaff, Husqvarna Viking), EXP (Melco), plus SVG and projects (.heatstitch). Convert a picture turns a photo or logo into a design, Start empty gives you an empty stage to draw and write on, See an example opens the demo project with eight designs, one per feature (flower, decor sampler, line stitches, lines with parameters, line effects, lettering, patch, towel). Under More examples are the cat, overlapping circles, confetti with jumps and three SVGs that are sewn on opening, among them the brush character 永 for the satin tool.
- At the top sits Design | Check (1 and 2). In Design you view and change the design, in Check the light Will it stitch? tells whether it will come out well on your fabric and fixes what won't.
- On the right, in the Design card, choose the hoop and, under Material, fabric and thread. Ready to stitch then names stabilizer, needle and speed.
- In Check the light shows Good, With care or Risky. Fix changes only what does not show; whatever remains, a proposal shows before and after.
- Save at the top right: pick the machine's format and save. Save as project keeps everything, including what embroidery files cannot store.
Every change is one step that Ctrl+Z takes back. Loaded files and your changes stay in this browser and are back after a reload. If you don't know where something is, Ctrl+K (or Search at the top) opens the command search What do you want to do?; it lists every command available right now with its key and runs it.
Your files never leave your computer. heatstitch reads, checks and saves them entirely in your browser. There is no server receiving them, no account and no tracking; the site is nothing but static files on GitHub Pages. Pictures for Convert a picture stay in the browser too.
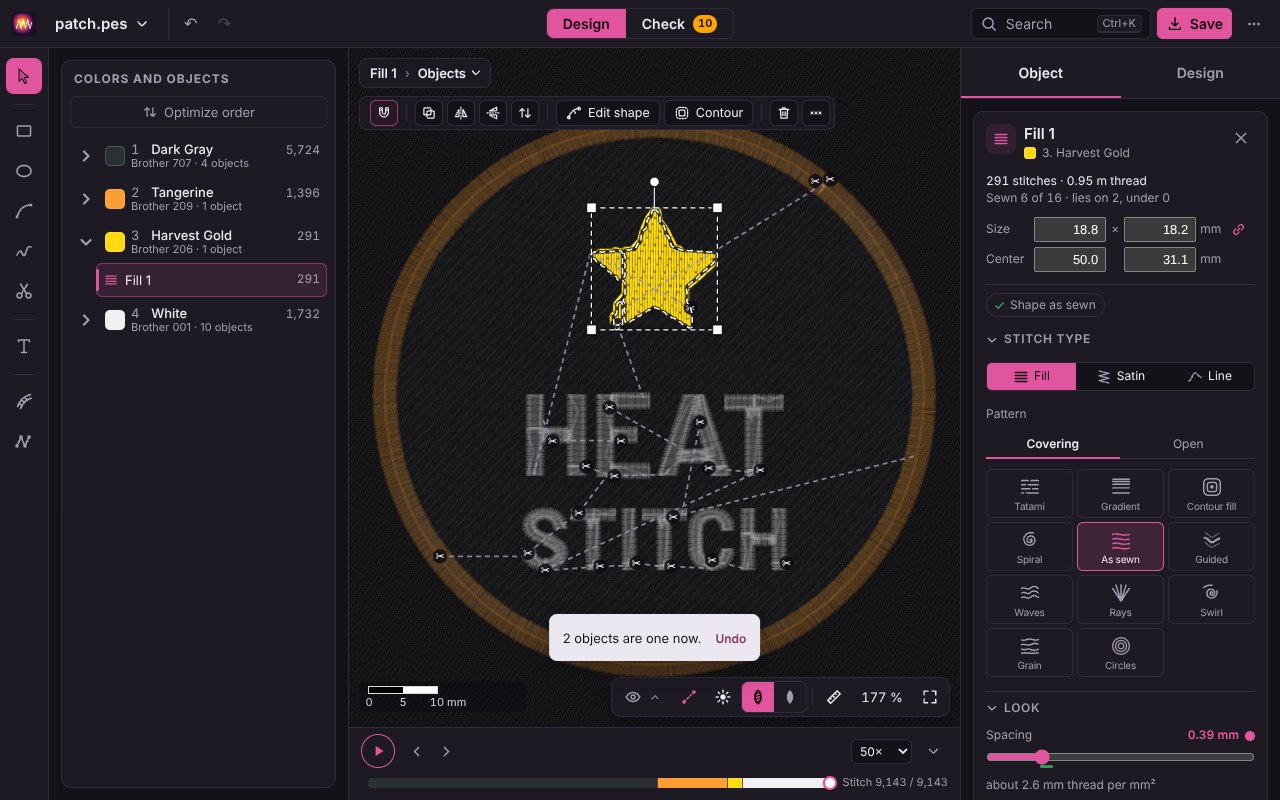
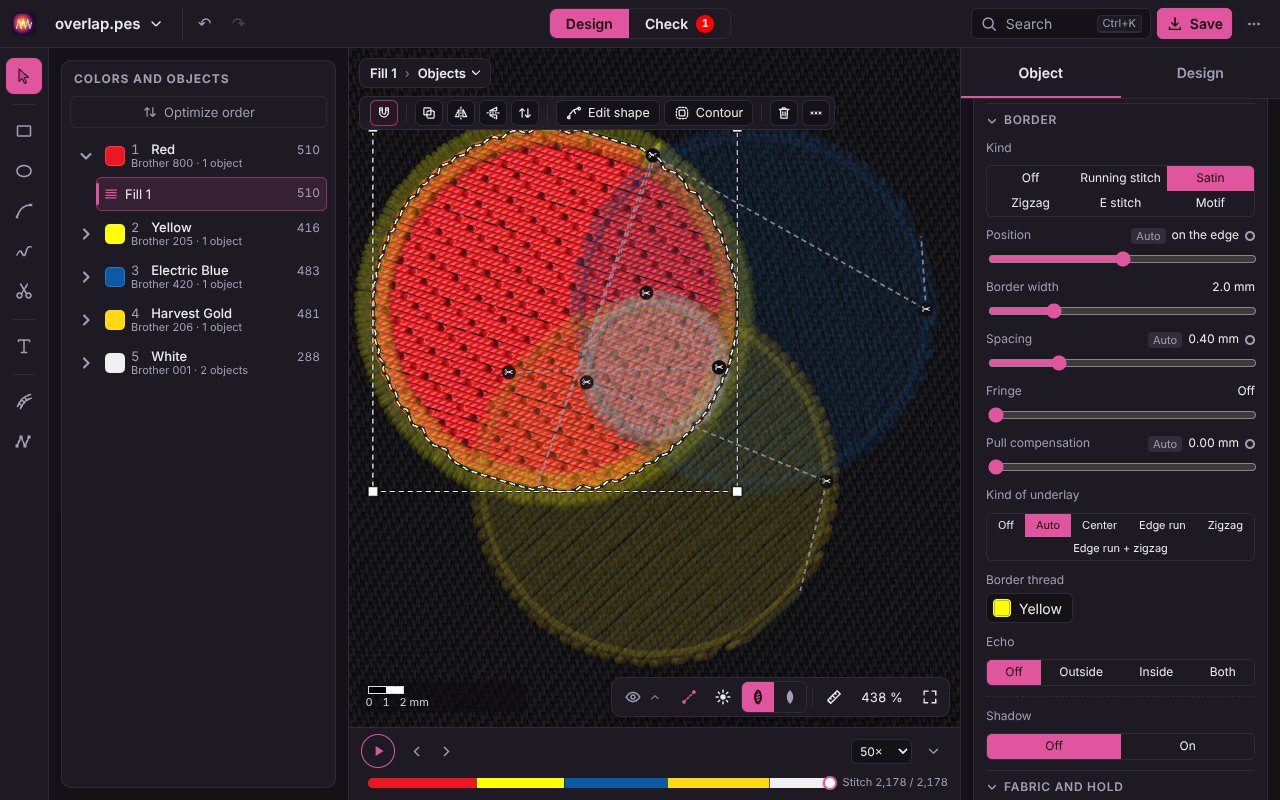
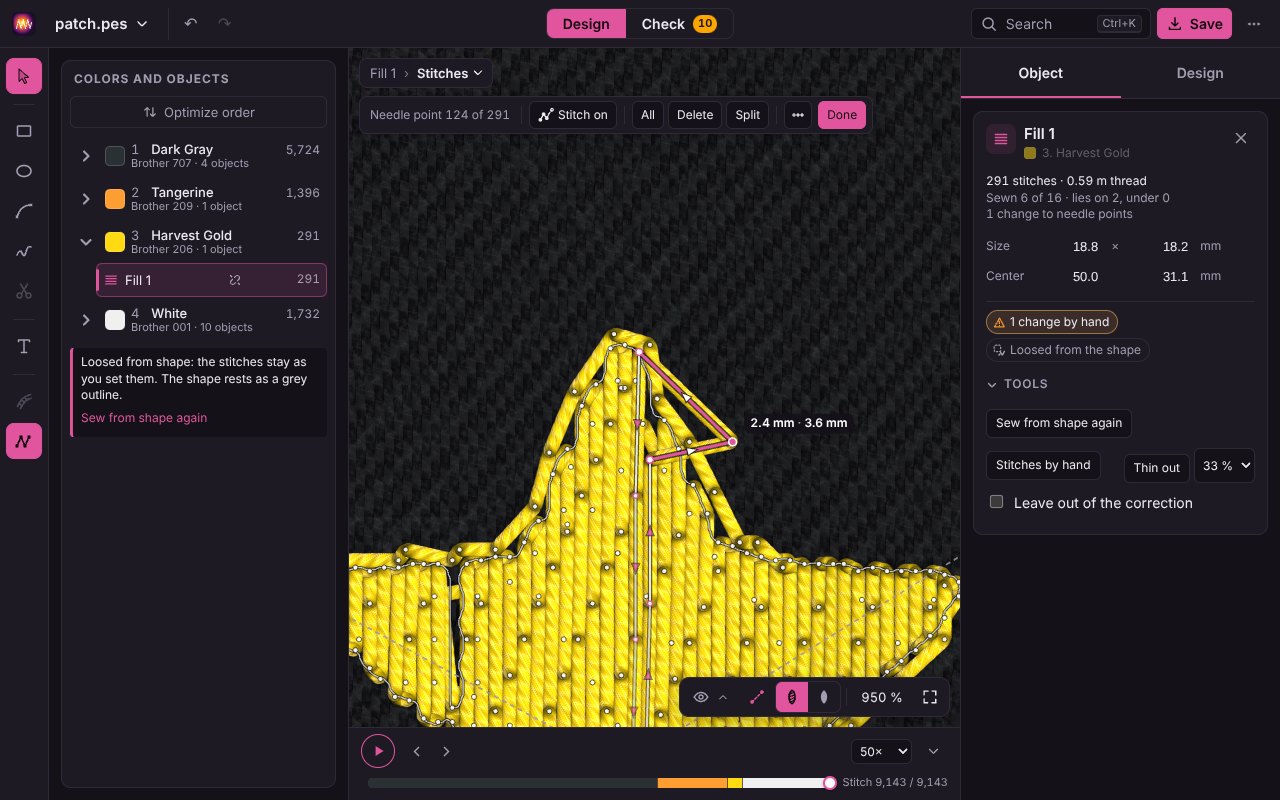
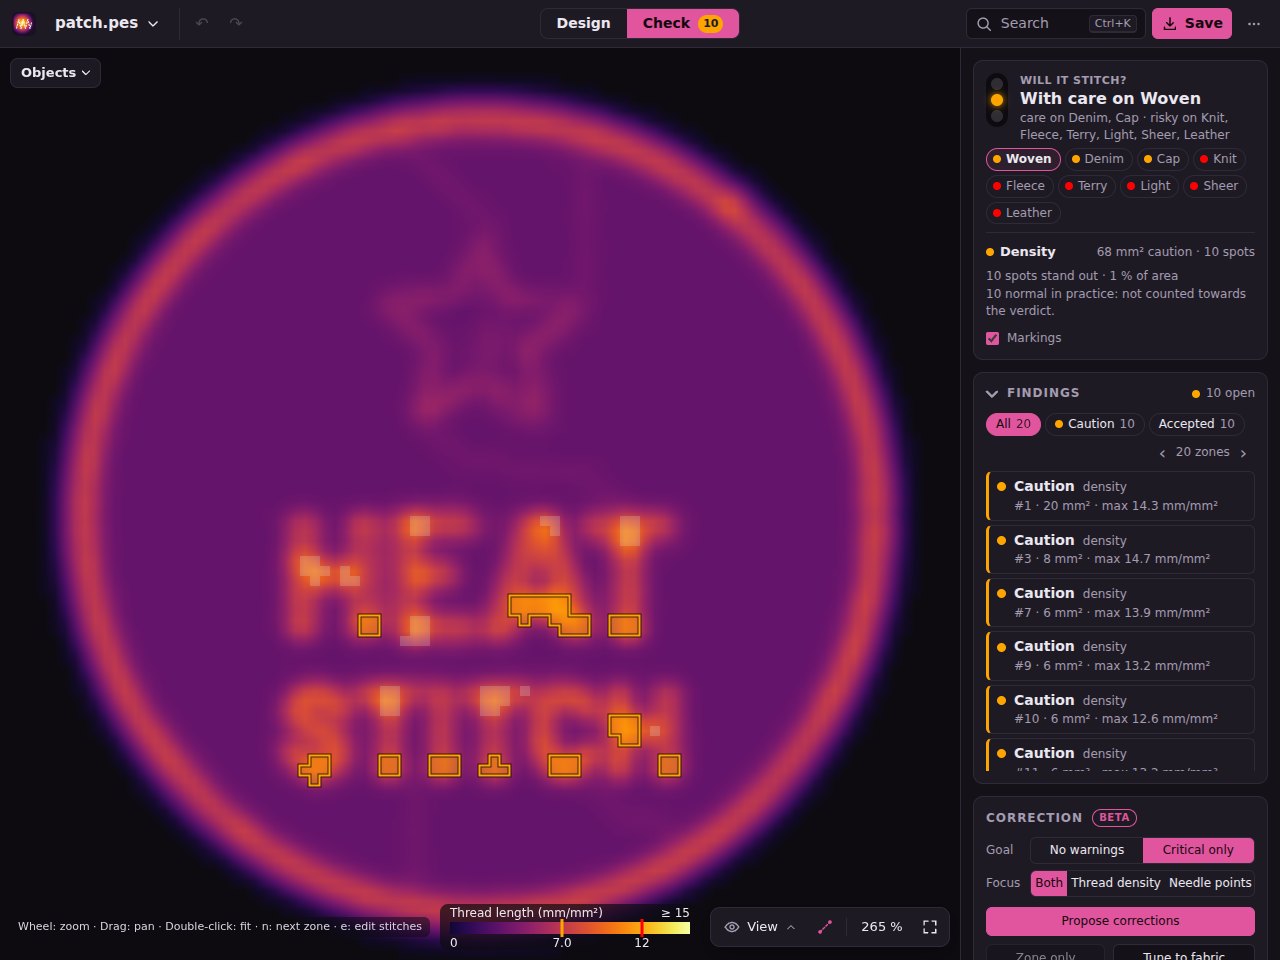
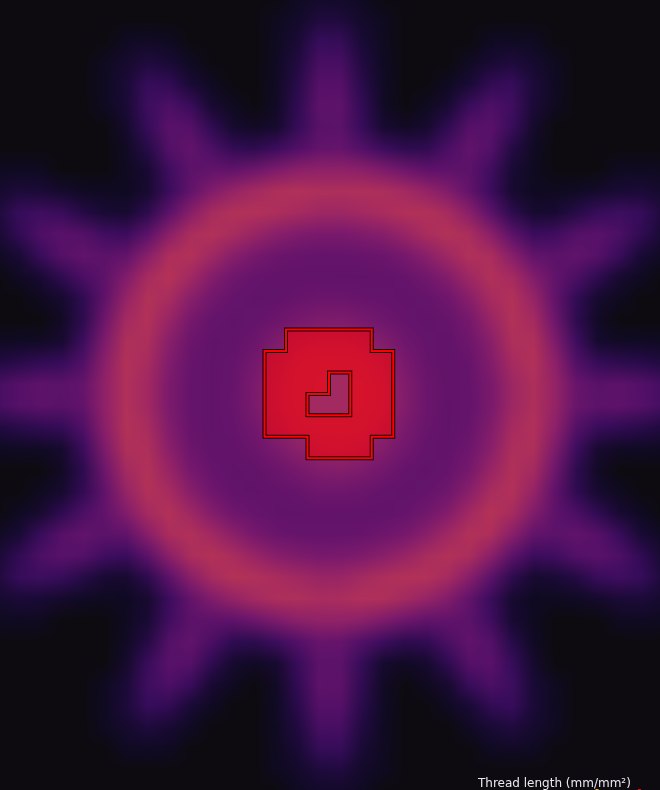
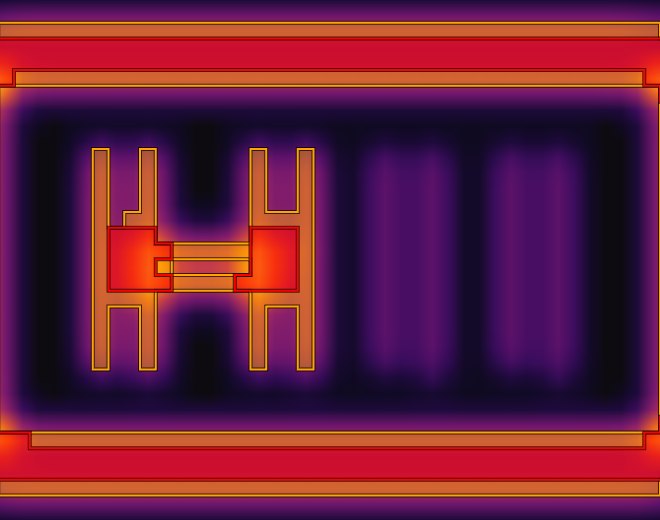
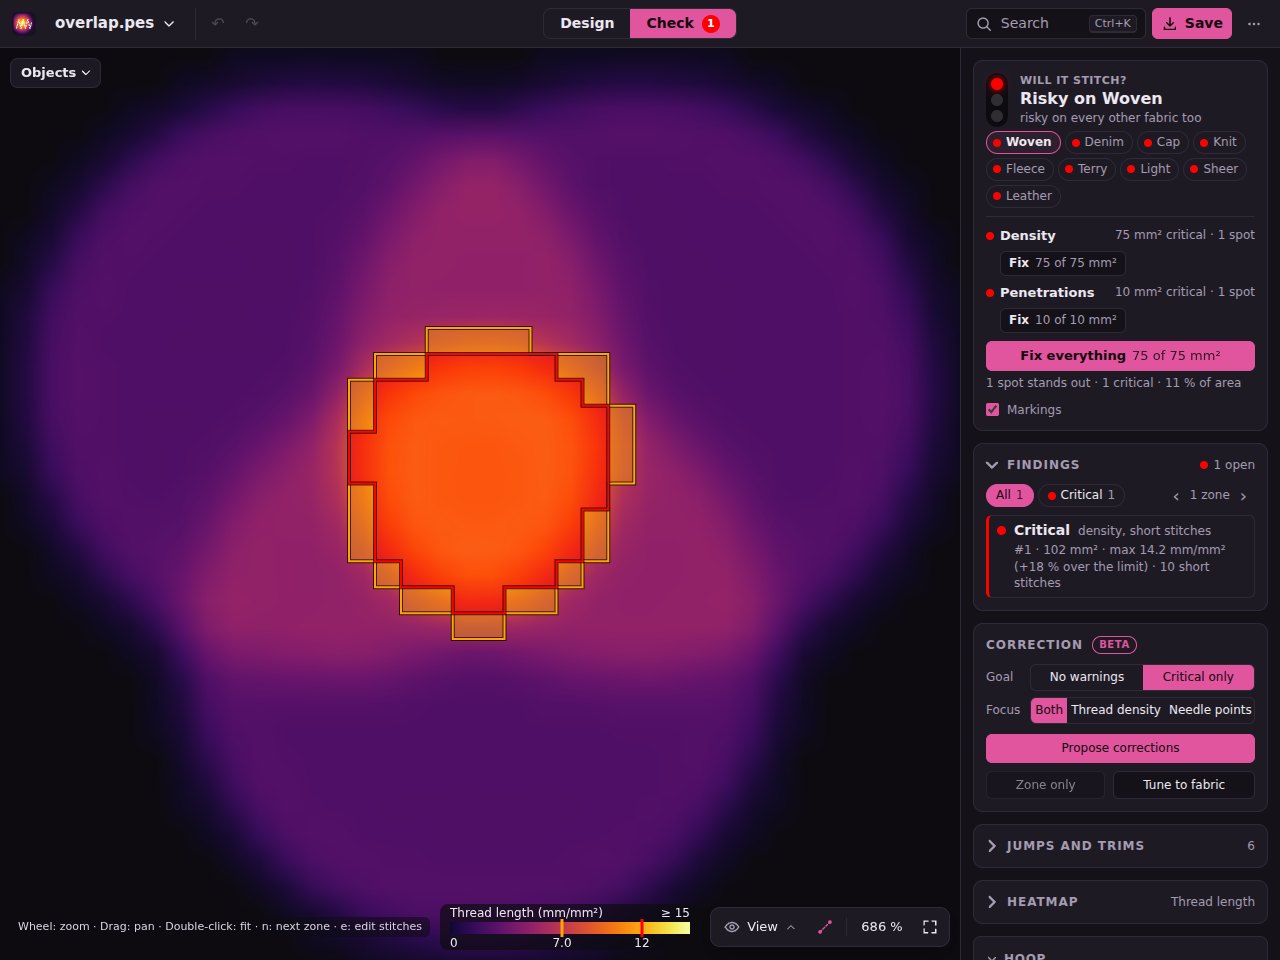
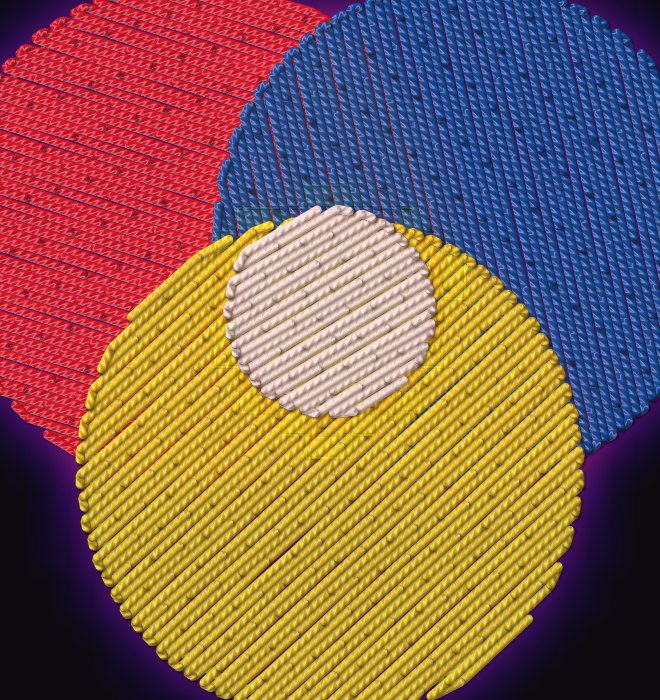
To try things out there are the demo files the pictures of this guide come from, each with a finding: overlap.pes (stacked fills), patch.pes (the patch of the demo project as an embroidery file: satin letters on a fill), sun.dst (short stitches), leather-patch.dst (perforation) and confetti.pes (jumps and trims).
The screen
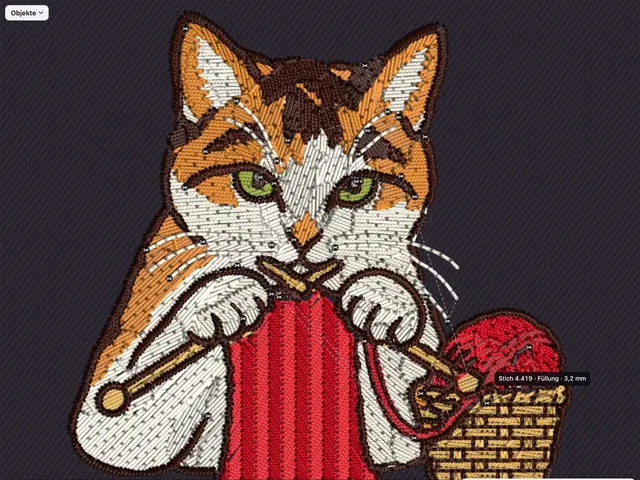
Everything heatstitch can do is a command: it sits as a button where you need it, in an object's menu, on a key and in the command search (Ctrl+K). Every button explains itself when you hover it. ? or the ⋯ menu at the top right shows the keys under Keyboard shortcuts; this guide and the language live there too.
- Header
- On the left the design's name with the Designs menu (▾): New makes an empty design, Open … fetches a file, Convert a picture starts the picture wizard, below are the open designs to switch between (J and K), each with a pencil to rename and × to remove, and the examples. Next to it undo and redo, in the middle Design | Check (in Check with the number of open findings), on the right Search and Save.
- Tools
- The bar on the left of the stage: Select (V), Rectangle (M), Ellipse (O), Path (B), Freehand (P), Cut apart (X), Text (T), Direction (R, the rungs of a satin) and Stitches by hand (E). Above the stage, below the path at the top left, a bar shows each tool's options, such as the node actions on the Shape level. With objects selected it shows what you can do with them (see below); how to drag, turn and scale them is then in the hint at the foot of the stage.
- Colors and objects
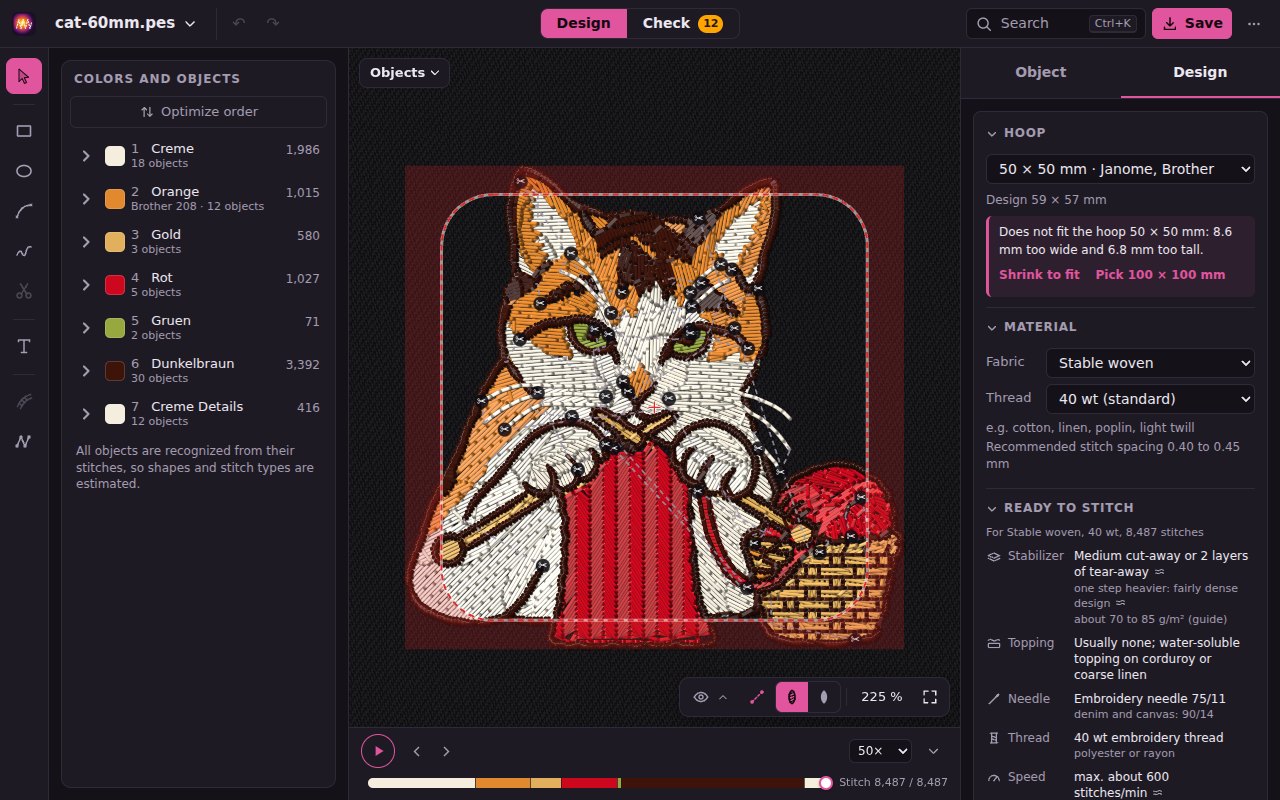
- The list on the left: the colors in sewing order, each with thread name and number, object count and stitches; the arrow opens it to its objects. At the very top Optimize order, at the bottom the Not sewn block. More under Sequence and colors and Objects.
- Stage
- The design in the middle. The breadcrumb at the top left names the selected object and the level: Objects (pick and order whole objects), Shape (edit the outline) or Stitches (single needle points); a click on it switches, Esc goes one level back. At the bottom right the view bar: the eye opens the View menu, next to it Measure (L), the zoom level and Fit (F or a double click on an empty spot). The scale bar at the bottom left. Mouse wheel, dragging and two fingers zoom and pan.
- Player
- The bar under the stage sews the design stitch by stitch, see Sequence.
- Cards on the right
- The Object tab shows the selected object with everything that makes it up; Design shows hoop, material, Ready to stitch, threads and figures of the whole design. In Check this is where the light sits, with findings, correction, jumps and heatmap. The columns can be dragged wider or narrower at their edge.
- Phone and tablet
- On a phone the tools sit in a bar at the bottom, and list and cards come up as a sheet from below; on a tablet they slide in from the sides. Tap selects, double tap opens shape or stitches, a long press opens the menu, two fingers zoom. Undo and Redo sit in the … menu. In the line tools (rungs, cut lines, guide lines) a Delete button in the line above the stage removes the selected line, since a phone has no Del key.
Sequence and colors
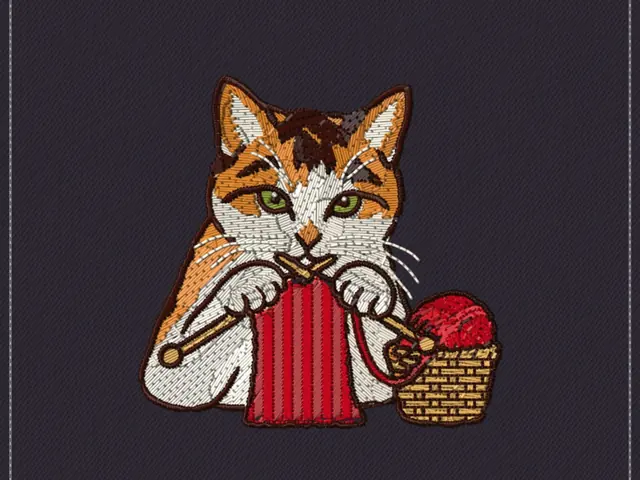
Design shows the design as the machine works through it. The Colors and objects list and the player under the stage make the sequence visible.
- Colors
- Each row is a color in sewing order, with thread, the brand's number, objects and stitches. The arrow opens it to its objects. The row's menu hides the color or highlights it and sews it earlier or later. While the player runs, a dot marks the color being sewn. A click on the color square picks another thread.
- Thread brands
- The color square opens the threads of a brand: Brother (the palette PES files store) or one of 71 other thread lines such as Madeira, Isacord, Gunold, Gütermann, Mettler, Sulky, Robison-Anton or Marathon. Type a number or a name to find a thread; when the current color is not one of that brand, the three nearest come first. Under Threads in the Design card you set your thread brand; Switch to … gives every color the nearest thread of that brand in one step (undo with Ctrl+Z). Colors on screen are only approximate, so hold the spool next to the thread chart when in doubt.
- Color list
- Color list (under Threads and in the Save menu) shows the threads in sewing order, with stitches and thread length per color, size and sewing time, ready to print and lay out.
- Color stitches by
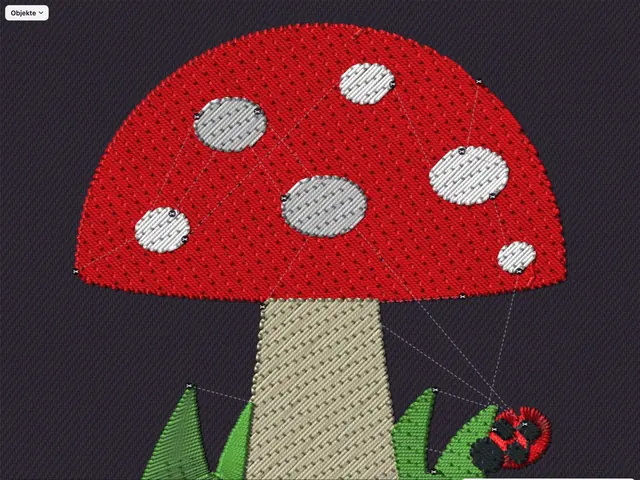
- In the View menu: Thread color shows the colors of the file. Order runs from dark blue (sewn first) to yellow (last). Stitch type tells satin, fill, running stitch and tie stitches apart. Stitch length marks short stitches under 1 mm, long ones over 7 mm and very long ones over 12.1 mm, which machines split.
- Player
- The bar under the stage sews the design up to one stitch: play and pause (Space), one stitch back or forward (, ., with Shift a hundred), Home and End. The speed is a multiple of the machine speed; the time shows how long the machine takes to get here, estimated from the speed under Figures plus a few seconds per trim and color change. The strip shows the colors in their thread; what is not sewn yet is dimmed. A click into the strip jumps there, the arrow at the edge folds the bar away.
Objects
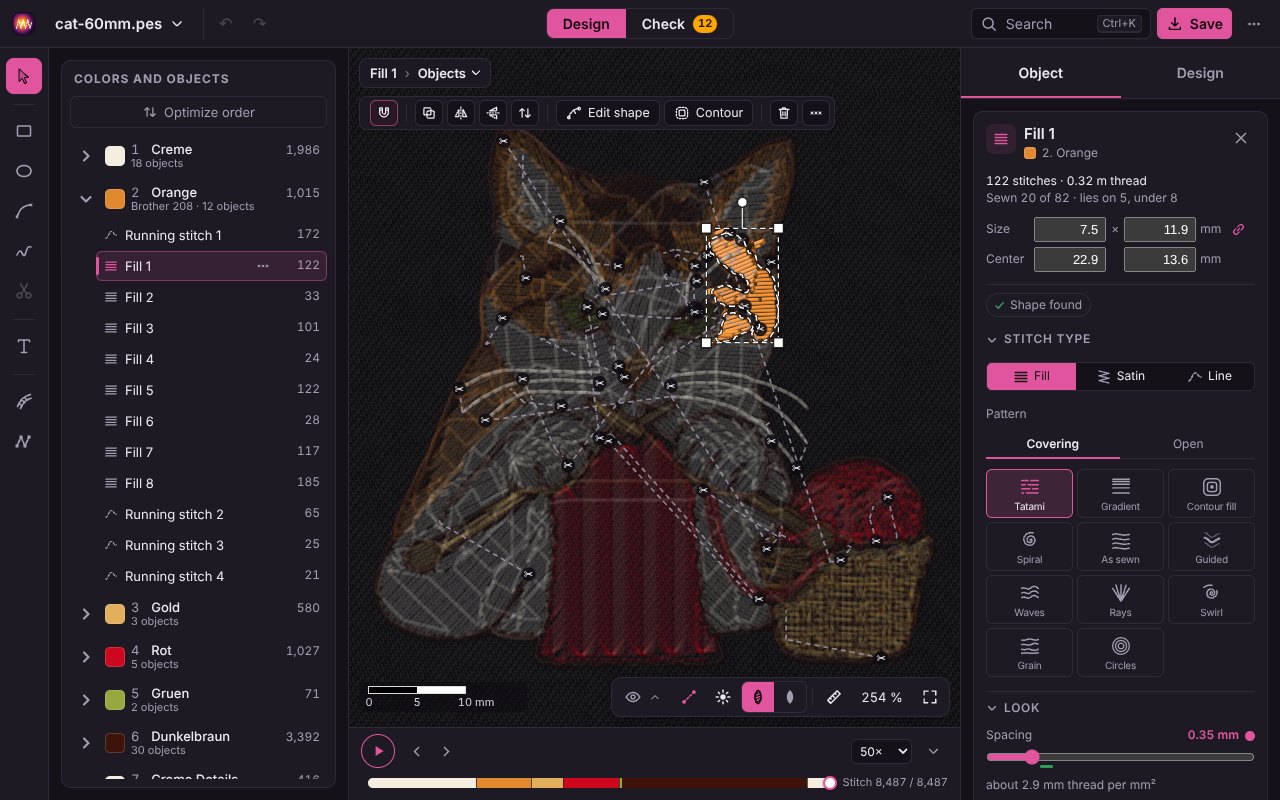
Embroidery files store only stitches, not the objects they were digitized from. heatstitch finds them again: an object is a fill with its underlay, a satin column or a line, recognized from the stitches. Usually the machine trims between two objects; when it trims inside an object, for example after the underlay, heatstitch joins the pieces again. Whatever is made in heatstitch or sewn anew here knows its kind exactly: converted pictures, drawn shapes, lettering and every object you changed once. With a file from elsewhere one line under the list says that all objects are recognized from their stitches; where both kinds mix, each recognized object carries a quiet ≈. The Object card shows it as a tag: Shape found for an area, Curve from the stitches for a line.
- Select
- Click an object in the list or on the stage. Shift or Ctrl adds more, Ctrl+A selects all. Shift+drag on the stage draws a box (on a touch screen: long press beside the objects, then drag); every object lying wholly inside it joins the selection. Esc or a click on an empty spot clears the selection. The Object card shows stitches and thread length, as which of how many it is sewn and on or under how many objects it lies.
- Order
- Drag an object or a whole color to another place in the list, or use the arrows Earlier and Later in the card (Alt+↑ and ↓, with Shift to the very front or back). Dragged between the objects of another color, it is sewn in that thread; the message offers Sew it in its own thread instead, then it keeps its thread and gets a color change. If an object would be sewn before something it lies on, that changes what is visible: the message says what now lies under what, and Ctrl+Z takes it back.
- Optimize order
- The button above the list looks for an order with fewer color changes, trims and travel and shows beforehand what it saves. Three switches: Combine colors sews all objects of one thread together where no other color has to lie between them; Shortest paths goes from each object to the nearest one allowed next; Reverse direction may sew satins and fills from the other end where that saves travel or trims. Where objects overlap, what is on top stays on top. A proposal is never worse than the current order: never more color changes, trims or sewing time, and longer travel only where it saves a color change or a trim; when nothing is better, the button says so. Apply makes it one undo step. For a single object, Swap start and end does the same: it starts where it used to end, and the way from or to the neighbor is often shorter.
- Move, rotate, scale
- Selected objects get a dashed frame on the stage. Dragging inside the frame moves them (Shift keeps the line), dragging a corner scales (the opposite corner stays; with Shift width and height freely; the objects are sewn anew while you drag, satin keeps its width and fills their density, so what you see while dragging is what you get), the round handle above rotates around the center (Shift: in 15° steps). The arrow keys nudge by 0.1 mm, with Shift by 1 mm. Moving and rotating take the stitches along unchanged. Scaling sews the objects anew at the new size with their own settings, so density and stitch lengths stay right. While you move them, their edges and middle snap to the edges and middles of the other objects and to the middle of the rest of the design, which is where the hoop's middle will be; a thin line shows what they hang on, Snap in the line above the stage turns it off, and Alt while dragging moves them freely. Under Size and Center in the Object card, type width, height and position in mm; with the lock on, the other side follows. The frame and the size fields work on the levels Shape and Objects alike.
- Duplicate, mirror, delete
- The bar above the stage, as soon as objects are selected: first Snap, then Duplicate, the two mirror buttons and Order, then with a word the steps that fit this selection (for several, say, Combine, Cut out and Contour, for one Edit shape), and at the end Delete and … with all further actions. A step that cannot be done right now is pale, and its tooltip says why. On a phone the bar shows icons only; Mirror vertically and the order are in the … there. Duplicate sews the selected objects once more, each 2 mm beside and right after its original, border included, as Ctrl+C and Ctrl+V do (each paste lands a step further); Ctrl+D puts the copies exactly in place, ready to move with the arrow keys; the two mirror buttons swap left and right or top and bottom around the center of the selection; Delete (Del) removes the selected objects, the last one too: the design is then empty, and undo brings everything back. A right click on an object on the stage, the … on its row in the list or a long press on a touchscreen opens the same actions as a menu.
- Thread of an object
- A click on the color square in the head of the Object card picks its thread. A neighbor's thread sews it along in that color; another one gives it an own color in its place, with a color change.
- Combine and split
- With several objects of one color selected, Combine in the bar above the stage makes one of them. With objects of different colors the button is pale, and its tooltip says why. It is sewn in the place of the first; before that, the layers are checked. Fills become one area with one outline and are sewn anew with the settings of the first, so the pattern runs through everything. The outlines are joined exactly on their curves: nodes and curves stay where they were, only the points where they cross are new. Lines become one line with all their paths, sewn with the settings of the first; ends that touch (up to 0.5 mm) are joined, and when that closes a path, Fill inside in the notice fills the area in it, for example a heart that comes from an SVG in two halves. With other objects in between, only fills can be combined. The other way round, Split into parts takes an object sewn in several parts apart into them, for example to see the underlay on its own.
- Cut apart
- The Cut apart tool (X) cuts a selected fill into parts: drag a line across the area (freehand), click for a path with corners, hold Shift for straight; when dragging, letting go cuts, with a path Cut does. Each part becomes an object of its own with the same settings and its own stitch direction, say to sew a leaf in two halves with angles like veins, or to split a large area into pieces that pull less when sewn one after the other. The cut is made on the curves: the parts keep the nodes and curves of the outline, and the cut edge follows your line smoothly. If the fill has a border, one border still runs around all parts together, never along the cut; Along the cuts too in the border adds a single line there. What you set on the border applies to all parts. The tool is there for fills heatstitch knows as a shape; a fill only recognized from the stitches (≈) is first sewn anew for it, say through a setting.
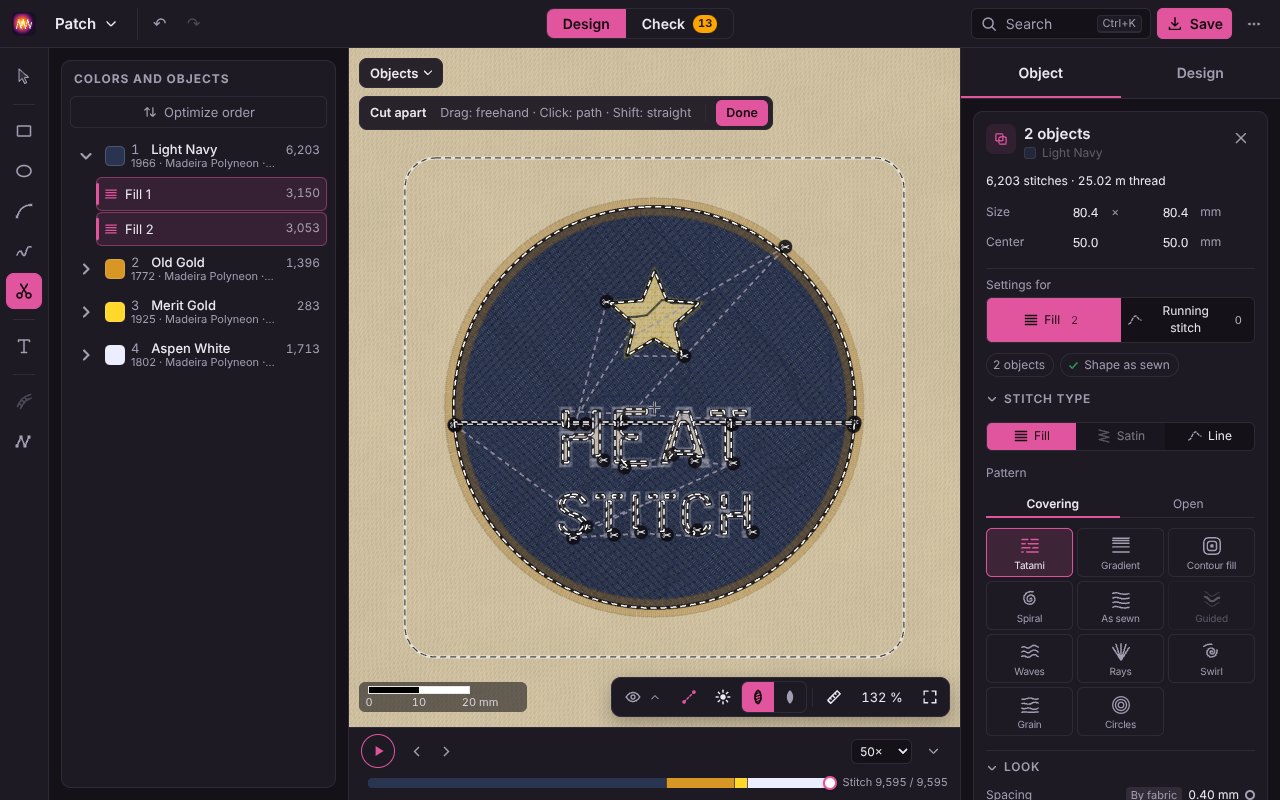
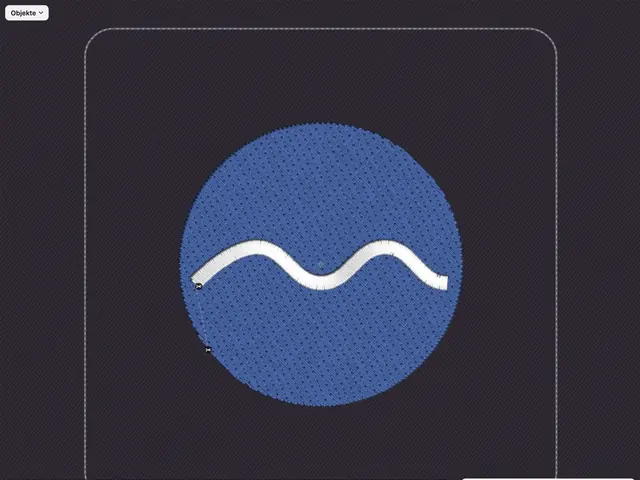
Cut apart: a straight line through the disc of the patch turns one fill into two, each with its own stitch direction. - Cut out
- With several fills selected, Cut out the top shape cuts the one sewn last out of the others and drops it, like punching a hole. The cut follows the curve of the top shape exactly. A cut fill with a border in a thread of its own takes the border along to its new outline.
- Contour around
- Contour around lays a line 2 mm outside everything selected: areas, lines in the width they are sewn, satins and lettering. Several objects get one contour together. It is sewn as running stitch in the thread of the first selected object, right after the last one. You set the distance live: in the field Distance on the Object card (negative means inward) or with the diamond handle on the right of the contour (with Shift in whole millimetres). Afterwards the contour is a line like any other: as satin it becomes the edge of a patch, as Fill its ground; then it moves in the order under the objects it encloses, so it does not cover them. It leaves out small holes where objects nearly touch; the hole of a ring or an O stays. The distance can be changed as long as the contour keeps its shape; once reshaped, or after opening the project again, it is an ordinary line. Undo takes it away in one step.
- Shapes on top of each other
- Where a fill lies partly under one sewn later, both are sewn there as long as you choose nothing else. The card above the list says how many fills would be sewn twice and offers Leave out or Keep it. Leaving out is a stitch setting, not a change of shape: Leave out under later shapes under Tools turns it on or off per fill; the fill still reaches 0.2 mm under an upper fill and under a satin by an adjustable share of its width, so no fabric shows. The shape stays whole. The order and direction of the pieces are planned so that the connecting stitches lie under rows still to come or inside the knocked-out part: there the fill mostly needs neither a seam along the edge nor a trim. Move, rotate or reshape the upper fill, and the lower ones are sewn anew to match, in the same undo step. Pull compensation and margin of the lower fill stay as set, and its border keeps following the whole shape. When the upper fill covers a lower one completely, the lower one is sewn whole until the upper one frees a part of it again.
- Not sewn
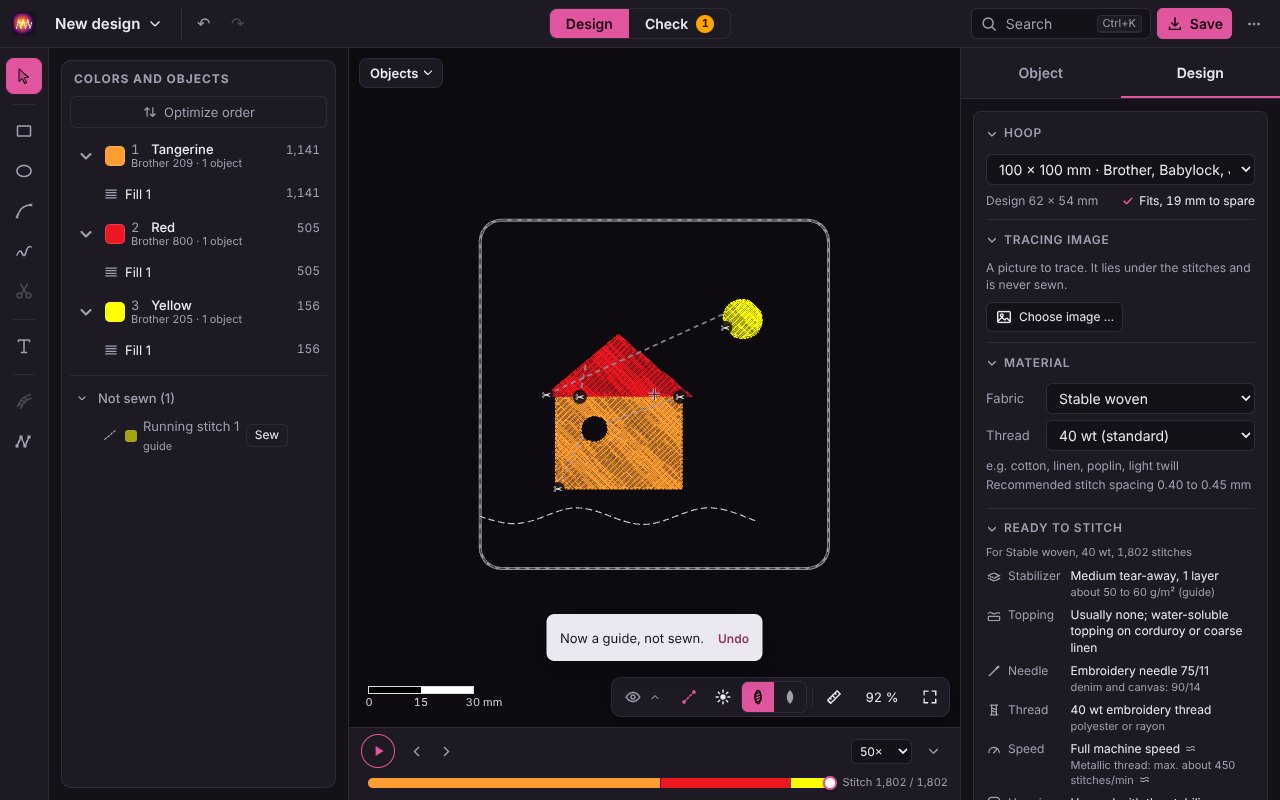
- Do not sew in the menu keeps the selected objects but takes them out of the stitches: they stay visible as a thin outline. Keep as a guide keeps them as a dashed line, say the outline of the garment or a line to align to; guides are never sewn. Both wait in the Not sewn block under the list. There, Sew again brings one back to its old place in the order, with stitches and settings as before; the menu switches between outline and guide or deletes it for good. If an SVG has a plain rectangle behind everything, as many drawing programs export it, that is a background: it is not sewn and lands there as well.
Stitch settings
Under Stitch type, Styling, Border, Effects, Fabric and hold and Tools the Object card shows how the selected object is sewn, starting from the values its stitches have now. A slider shows the new stitches at once; on release they are taken over. A value that heatstitch sets from fabric, thread and size carries the Auto tag; an own value gets a dot, and a click on it goes back to Auto. The green mark on a spacing is the range recommended for your material. Changes apply to all selected objects.
- Shape found
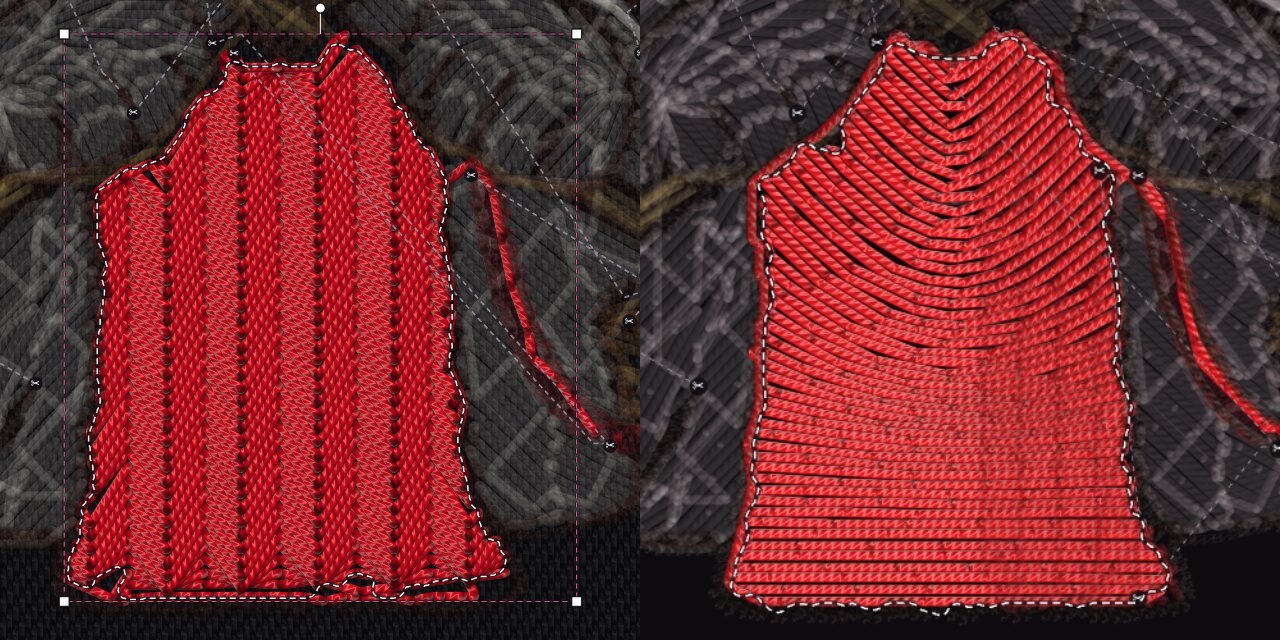
- The area of a fill is recognized from its rows and shown as a dashed line. Where the rows are too loose or patchy to find the edges, the line is orange, and the card says the shape is approximate. Once heatstitch has sewn an object anew, it keeps exactly this shape and pattern for the next change. So the shape does not drift, even after many changes. A fill from a foreign file whose rows run curved gets the Gradient pattern with the same curves when first sewn anew; a line that was sewn out and back stays a line out and back.
- Change the stitch type
- Under Stitch type sits Fill | Satin | Line. A satin becomes a fill of the same area and a fill a satin. Satin only works for narrow strokes up to 7 mm that stay about equally wide; otherwise the button is off and the reason is given below it (wider areas: see Rungs to satin). Back and forth, the shape stays the same.
- Loose from the shape
- Loose the stitches from the shape under Stitch type (also in the command search) detaches the stitches of an object from its shape. No slider and no correction sews them anew any more, so changes by hand stay; moving, rotating and scaling take them along as they are. The shape rests as a thin grey outline, and the card previews how the object would be sewn from the shape; Sew from the shape again does that.
- Original stitches
- For an object from a loaded embroidery file that heatstitch has sewn anew, the card offers Original stitches: the object gets back the stitches it had in the file, in its place in the color and order of now, as one undo step. Not for objects cut apart or copied.
- Exclude from the correction
- The switch under Tools keeps the correction away from this object; by hand it can still be changed.
Fill
- Pattern
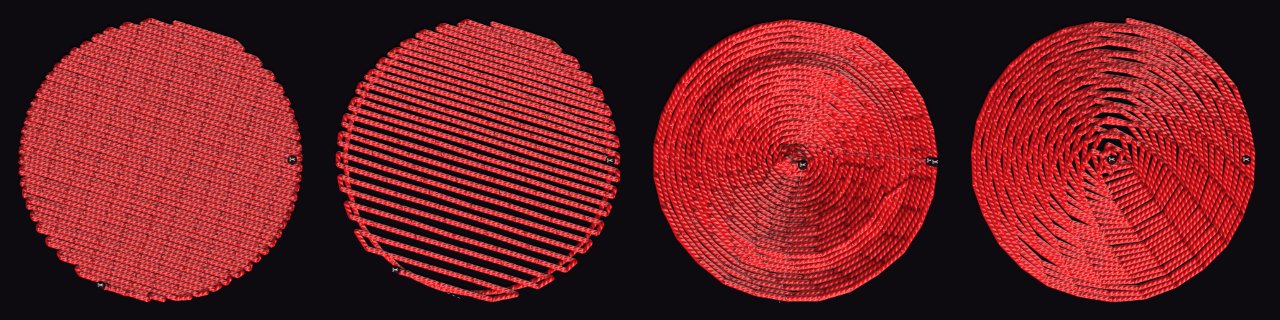
- Tatami sews straight rows; Offset under Styling shifts the needle points from row to row by 1/4 (the usual tatami), 1/2 (a brick pattern) to 1/5 of a stitch or randomly, to hide lines. Gradient lets the rows run curved across the shape or opens them from one spacing to another, for shading and soft edges. Contour fill runs the rows along the outline, ring in ring. Spiral winds one line from the edge to the center of a round shape. As sewn keeps the directions and curves of the current rows, and zigzag rows as in a knit pattern stay zigzag; fills from a picture that follow the image and objects with several angles start with it. Guided lets the rows follow drawn guide lines.
- Decorative patterns
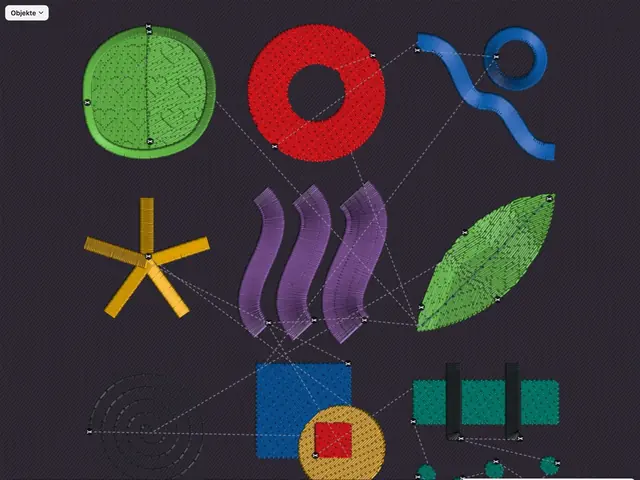
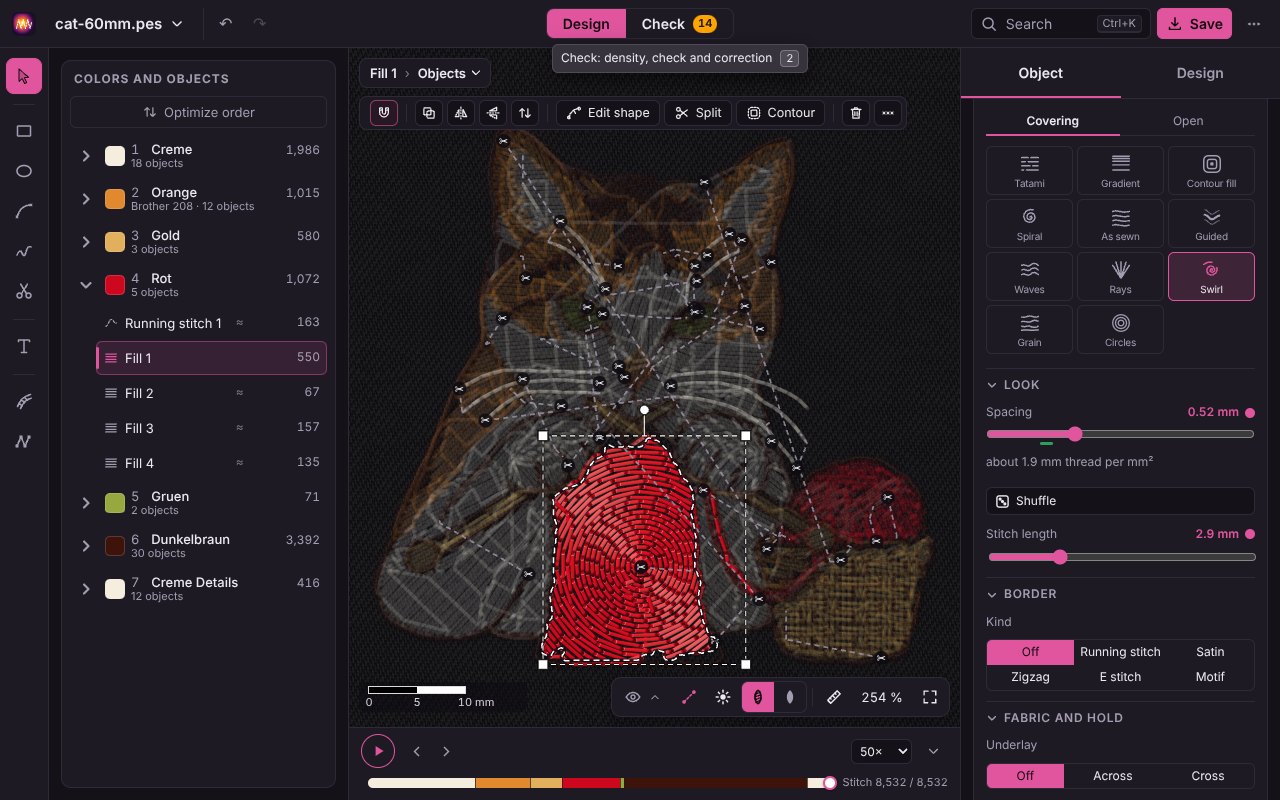
- The patterns sit in two tabs: Covering and Open; a dot on a tab shows where the pattern of the selection is, and pointing at a tile previews it. Covering: besides the classic patterns, Waves, Grain, Rays, Circles and Swirl make the rows swing, flow like wood, fan out from a point, ring around a point or circle around eddies; Shuffle shows another variant. For rays, circles and swirls, Set points under Tools shows the points on the stage: drag them where you like; a click into the area adds a swirl (up to three). Embossing under Styling lays diamonds, waves, stars or hearts into the rows, only by where the needle goes in, so the density stays the same; the motifs always stand upright, and Strength Clear sews the stitches inside the motif half as long, so it stands out as a finer, more matte area. Blend in a second color in the menu of a fill makes a color blend: the fill fades out and a second thread fades in the other way on the same area, so together it stays as dense as before. The second color follows the fill like a border: set shape, direction and spacing at the fill; another pattern or deleting takes it out. Open: Meander, Maze, Grid (honeycomb, diamonds, bricks), Echo and Cross stitch are light line patterns the fabric shows through, optionally in triple stitch, also for large areas. Grid reaches the edge with its cut cells, Meander and Maze come as close to it as their line spacing allows; the preview on pointing looks like the result. They leave gaps on purpose, so the check reports none there. If an area should show only its outline, choose Line under Stitch type: the object is sewn as a line along its shape and covers nothing below; Fill fills it again with the pattern from before.
- Spacing, angle, stitch length, edges
- Under Styling: Spacing between neighboring rows (smaller is denser; the card converts it to thread per mm²), Angle of the rows (0 to 179° in steps of one degree, at the dial or slider), Stitch length along a row. Edges under Fabric and hold lets the rows reach further (+) or less far (−) at both ends: pull compensation, because the thread pulls the fabric together. Auto sets it from the fabric and the size of the fill; an own value turns that off.
- Expand
- The whole area up to 3 mm larger or smaller all round before it is filled: closes gaps to lines and neighbors or keeps a distance from them. The shape itself stays.
- Underlay
- Off for small areas and thin fabrics, Across (one loose layer across the rows, sewn first) or Cross (two layers crosswise, for stretchy and fluffy fabrics). Plus its inset from the edge, fixed in mm or as a share of the area's width, its row spacing and Leave out under later objects: where later objects cover the fill completely, the underlay is dropped, which saves thread and bulk under satin borders. Auto picks the underlay by fabric and size.
- Border
- A line around the fill with the same stitches as a line: Running stitch (also as bean stitch), Satin with width, pull compensation and underlay, Zigzag, E stitch or Motif. Position puts it on the edge of the fill or offset inwards or outwards. The border is an object of its own in the list, trimmed off the fill and sewn right after it, in the fill's thread or, with Border thread, in one of its own. Earlier, Later or dragging it in the list sets when it is sewn; it stays linked to the fill, follows its shape and is duplicated with it until you take it off with Detach. Its card names the fill it belongs to in its head; on the level Shape you drag the width of a satin border at the grip of its band. The border is the line of the fill: when the shape has open paths beside the filled area, such as the veins in a leaf, the border runs along them too; only what is closed is filled. Like a line it gets Echo copies and a Shadow under Effects, which follow its offset curve, and as satin a Fringe, with Fringe on Inside, Outside or both sides, such as fur around an area. An SVG shape with fill and stroke becomes a fill with a border in the stroke's thread. In an opened embroidery file, a line sewn along the edge of a fill is recognized as its border and offered in the fill's card.
- Guide lines
- Choose the pattern Guided, open Guide lines under Tools or press G with a fill selected and drag freehand across the area: the rows follow this line, exactly near it and more loosely further away. With several lines the rows blend from one to the next, so a round neckline turns into a straight hem. Every line sews the fill anew on release. Click a line and press Del to delete it (on a phone the Delete button above the stage); without lines the fill returns to straight rows. Esc or Done in the line above the stage closes the tool.
- End near the next object
- A fill with straight rows ends near the start of the next object when that makes the way there shorter. This happens on its own.
Satin
- Pattern and spacing
- Satin sews densely from rail to rail; the E stitch runs along one edge and crosses over and back at intervals, for appliqué (the edge lies on the left in sewing direction; Swap start and end puts it on the other side). Spacing is the distance between the stitches on one side. Spacing by width makes narrow parts a little looser and wide parts a little denser, so the column covers evenly everywhere.
- Fringe
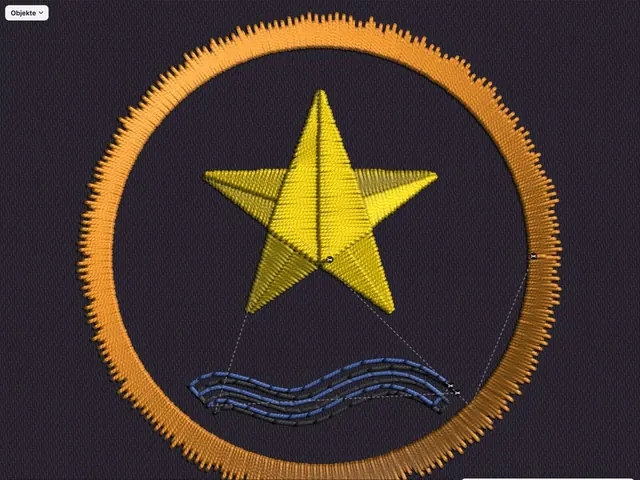
- A ragged edge like fur, feathers or grass: every stitch ends a different distance short of the edge, up to the value of the Fringe slider (up to 5 mm). Fringe on chooses whether both edges, only the left or only the right one (in sewing direction) fray; the other stays smooth. On a border the sides are called Inside and Outside. A satin with a frayed side from an opened embroidery file is recognized with its fringe; depth and side are already set in the slider.
- Pull compensation
- Sew the column up to 3 mm wider or narrower on each side, because the fabric pulls it in while stitching. Sides apart sets left and right on their own, Pull comp. by share gives wide parts more by a share of their width than narrow ones. Auto sets the value from the material. The column's own width is its rails on the level Shape.
- Short stitches, split
- Short stitches in curves lets every other stitch end earlier on the inside of curves so the needle points don't crowd. Split from splits long stitches so they don't snag (Auto: from 7 mm), Staggered split moves the split points along so no groove runs down the column.
- Underlay
- The kind: Auto (center walk up to 4 mm width, zigzag above, along the column by its width), Center, Edge run (just inside both rails, for sharp edges), Zigzag or Edge run + zigzag for wide columns on soft fabric, with its distance from the edges in mm or as a share of the width.
- Direction
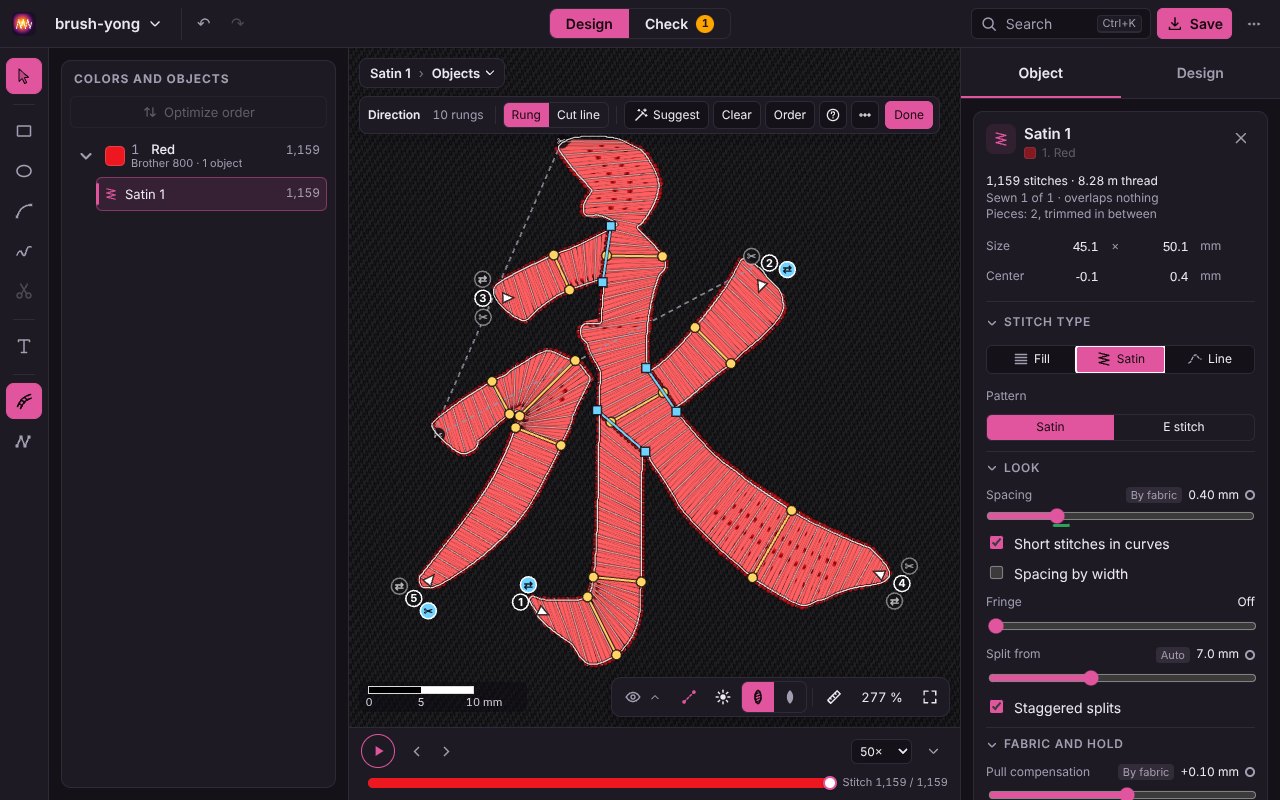
- The Direction tool (R, in the tool bar and under Tools) opens the rungs of a selected satin on the stage: lines across the column that set how the stitches lie. Between two rungs the direction turns evenly, so a curve or corner fans out instead of the stitches piling up. At first the rungs follow the stitches as they are and are dashed. Dragging across the column sets a new one, dragging an end slides it along the edge, clicking a rung and Del removes it (on a phone the Delete button above the stage). Every satin opens in the view of its area, whether it comes from an embroidery file, a picture, an SVG or was drawn, and a satin of several separate pieces with each piece in an area of its own: if it consists of sections, they appear with their cut lines, and each section is faintly drawn ahead the way it will be sewn. Rungs are yellow with round handles, cut lines light blue with square handles, also while dragging and when selected. A section that makes no column yet, say without a fitting rung or with a hole that is not opened, is outlined red and tells you what is missing when you point at it. In the line above the stage: Suggest (wand) sets cut lines and rungs the way you would cut the satin by hand (see Suggest below), Clear removes every cut line and rung to start over: only the area with its outline is left, and it is sewn anew once the lines drawn make columns again (until then the stitches stay as they were), Remove all turns the direction of a column without sections evenly from start to end, As sewn returns to the stitches as they were. Every change sews the column anew at once; rungs and cut lines are kept, also in the project. Esc or Done closes the tool.
- Spacing along the column
- Click a rung and set Spacing here: from there the spacing blends to the next rung, say for a column that should be denser at its wide end.
- Satin sections
- In the Direction tool switch Draw to Cut line (or press T; Shift+drag draws the other kind) and drag across the column: a cut line (light blue) splits it, there the column starts afresh, and both parts meet cleanly in a miter instead of fanning around a sharp corner. Suggest sets them for you; on a ring or an outline letter that yields no whole suggestion, it puts rungs at the bends and cut lines at the sharp corners. The sections are sewn one after the other without a trim and stay one object; click a cut line and press Del to remove it. Each section shows its place in the order where its satin starts: click the number to sew it one place earlier, the arrow to turn it round, the scissors to trim before it, ⇄ to mirror it so it starts and ends on the other side. A column without cut lines shows the arrow and ⇄ as well.
- A section as a column of its own
- Within a section a rung may also run from one side back to the same side or end on a cut line, for instance straight across the middle leg of an m whose inner rail runs down one side of the leg and up the other. The section then finds its own two rails so that all its rungs go across, and a cut line becomes part of a rail, a shortcut of the path. The rails it is sewn along show dashed. Where a rung would leave the column lopsided, a cut line before it is missing, and the hint says so.
- Rungs to satin
- A fill too wide or too uneven for the simple change to satin can still become one: open Rungs to satin under Tools (or press R on a fill) and drag at least two lines across the area, from one end to the other. They cut the area into a column and set the stitch direction; Sew as satin in the line above the stage sews it that way, and the lines stay its rungs.
- A fill cut into columns
- With Rungs to satin on a fill you can also draw cut lines (switch to Cut line, press T, or hold Shift while drawing). They split the area into parts, for example the three legs of an m from its arch, and each part becomes a column of its own: one rung in it is enough. The parts are sewn as one run without trims: a part that hangs off another is sewn out and back first, and the way between them stays under satin that comes later. A hole, as in e, R or o, is opened with a cut line from the edge into it (with several holes, as in B or 8, one each, also from hole to hole); the satin then goes round it. A part that makes no column or a hole not opened yet is outlined in red. Each part shows its place in the order where its satin starts: number, arrow, scissors and ⇄ as with the sections; Best order picks order, direction and mirroring so the ways between the parts run under satin still to be sewn, as when the fill is first sewn as satin. The cut lines stay editable: drag an end, click one and press Del, or draw a new one, and the area is cut into parts anew. Until every part has a rung and every hole is open, the stitches stay as they were.
- Suggest
- Instead of drawing every line yourself: Suggest (wand) in the row above the stage, on a satin as on a fill, looks at the area and sets cut lines and lines across the way a digitizer would set them by hand. Cut lines you drew yourself stay, the suggestion adds to them; Clear removes them all to start over. At a crossing the straightest line runs through, the others end on its edge; short spurs stay on. Thick places such as a nose or a pupil are cut off: pointed areas fan out from their tip, dots up to 12 mm are split into two halves. Spikes as on a star or a tuft of grass are cut off at their base and sewn from the base to the tip, frames and block letters are mitered at their corners, leaves are split along their vein and drops along their axis, a crescent is sewn as one turning column. The message names the shape it found and the number of sections; a part that makes no column yet is outlined red and needs a line by hand. All lines can be moved or deleted afterwards; on a fill then Sew as satin, a satin is sewn anew at once, and Undo brings back the old state. The stitch type Satin on a fill cuts it the same way R and Suggest do. If the area is too wide or too blotchy for satin, the message says so, and lines across can still be drawn by hand. Smart in Image to stitches picks the same cuts as Satin in sections.
Lines and running stitch
- Lines
- Lines are sewn exactly along their curve: drawn lines, lines from an SVG (from 1 mm width as satin of that width) and the running stitches of an embroidery file, whose curve is read from their stitches, as they were sewn, out and back included. Under Stitch type Line you set the Kind: Running stitch with the stitch length and the max. deviation in curves (how far a stitch may lie beside the curve at most; in tight curves the stitches get shorter for that, never under 1 mm); Satin with width, spacing, pull compensation and underlay; Zigzag, an open zigzag with width and spacing, to tack down appliqué or as decoration; E stitch, a running stitch on the line with prongs to one side (Prongs right or left), the classic appliqué stitch; or Motif, a small figure repeated along the line: Waves, Scallops, Hearts or Chain, with its size, the spacing from one figure to the next, the stitch length (the longest stitch, shorter in tight bends so the figure stays round) and the side for scallops and hearts. Repeat 1× to 5× sews every kind several times, for a bolder line: for running stitch and motif, at 3× and 5× you pick Bean stitch, then each stitch goes forward, back and forward again; otherwise the whole line is sewn again, an open one out and back. Bean stitch comes only with odd numbers. Satin repeats without a new underlay. The border of a fill offers the same stitches; there prongs, scallops and hearts point inside onto the area or outside. Swap start and end sews a line from its other end. On the Shape level you move its nodes and the stitches follow; On the level Shape, Close path joins its ends with a straight piece, Open path opens the path again after the selected node. A closed line is filled inside with Fill under Stitch type or sewn with Satin across the area; Line sews only the outline again, pattern and settings stay remembered. Opening the last closed path of a fill or of a satin across an area makes the object a line along its shape; once a path is closed again, the notice offers Fill again or Satin again. Open paths beside closed ones are not filled; the notice says how many there are and offers Close path. Fills with the patterns contour fill, spiral and as sewn have a max. deviation too.
- Echo
- Under Effects: adds copies of the line at the same distance beside it, as in echo quilting: on One side (Other side moves them across) or Both for an open line, Outside, Inside or Both for a closed one, with the number of copies per side and the Distance from line to line, 0 to 10 mm: copies may overlap, the green strip under the slider shows from where they no longer do. Order Inside → Outside or Outside → Inside sets whether sewing goes from the line outwards or from the outermost copy in. For motif, zigzag and E stitch, Phase shifts the pattern of each copy against the one before (up to ±180°, it adds up), so the waves run offset. Pointing at the echo's settings brings out the copies on the stage and everything else fades, the line too; pointing at a copy's thread only that one. The line and its copies are sewn in one run, a short stitch from one to the next; Between copies Trim cuts the thread instead. Under Thread per copy a copy gets a thread of its own: such copies are an object of their own, linked to the line and sewn after it; Detach separates them. The echo follows every change of the line and stays on its side at corners and on mirrored lines too.
- Shadow
- Sews the line (with its echo) once more, moved in the Direction (0 to 360°, at the dial or slider) by the Distance (0 to 10 mm; the green strip shows from where shadow and line no longer overlap), in a thread of its own (dark grey to begin with) and before the line, so the line lies on top. At distance 0 the shadow lies entirely under its line and is not sewn; a larger distance brings it back in its thread. The shadow is an object of its own in the list, linked to the line: it follows it when it is changed, moved, turned or duplicated and goes with it when it is deleted; its direction stays, as with light from one side. Pointing at its settings brings it out on the stage. Detach makes it a line on its own.
- Wide line as fill
- A satin line can be sewn as a fill of its area: choose Fill under Stitch type. The area still comes from the line and its width, with Ends flat or round; Line makes it the same line again. That suits wide lines whose satin stitches would get too long.
Edit the shape
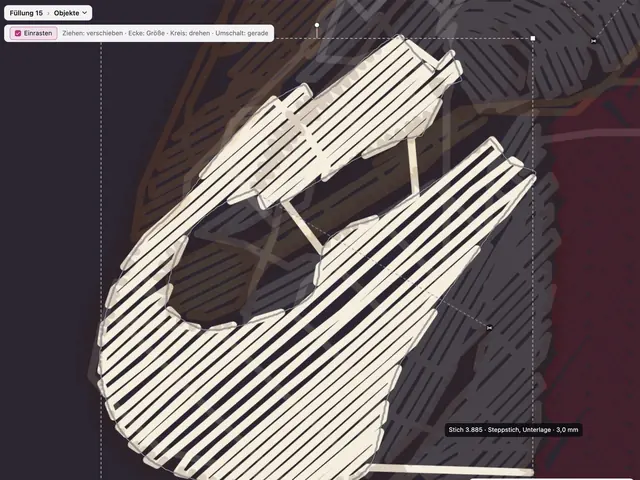
The breadcrumb at the top left of the stage names the level Objects | Shape | Stitches and sets what a click acts on. The level Shape is the workshop: here you draw shapes and see frame and nodes of a chosen object together. Select an object and press Enter, double click it or use Edit shape in the card to show its outline as curves with nodes: squares are corners, circles smooth nodes. Drag a node or a handle of the selected node; dragging the outline between two nodes bends it. New nodes are dragged out of the hollow dots: one sits in the middle of each piece, and beyond each end of an open line a dot with a plus that makes it longer; a click puts the node right there. A double click on the outline sets a node there too, Del deletes the selected one, C makes it a corner or smooth, the arrow keys nudge it. On release the object is sewn anew in the new shape with its settings. The outline is read from the stitches once (or taken over as the picture, an SVG or drawing made it) and kept as curves from then on, also in the project; so it does not drift. Around the outline stays the frame: drag inside it, away from the nodes, to move the shape. A satin from an embroidery file shows its two rails as lines: drag them and its needle points follow, its pairs, rungs and sections stay, and it is sewn anew with its settings. With the switch Stitches | Shapes on the stage (S) a satin appears as a whole area. A line sewn as satin or as a fill along it shows its band dashed with a round grip on its edge: drag the grip to make the band wider or narrower, its width in mm shows beside it; a fill with a satin border shows the border's band the same way. How the band is filled (spacing, pull compensation, underlay) stays in the Object card. An outline with 12 nodes or more offers Simplify: fewer nodes, at most 0.3 mm beside the old outline, corners staying corners; press it again to go further. When a shape has several open paths, Join (Ctrl+J) joins the selected end to the nearest end of another path, without a selected node all open paths, nearest ends first: ends up to 0.5 mm apart become one node, ends farther apart get a straight piece between them, and the notice says how long it is. When start and end then meet, the path is closed, and Fill inside in the notice fills it. Nodes at crossings puts a node where paths cross without changing the shape; Split path here splits an open path at the selected node into two. Enter goes on to the stitches, Esc or a click beside it leads back to the objects.
Single stitches
Stitches by hand in the tool bar (E), Stitches in the breadcrumb, Enter on the shape or Edit stitches in the card opens the stitches of an object: the needle points show at any zoom, the rest fades, and the breadcrumb names the object. Drag a needle point or nudge it with the arrow keys (0.1 mm, with Shift 0.5 mm); a label shows the two stitches at this point, orange under 1 mm, red over 12.1 mm. Double click on a stitch sets a needle point there, I splits the stitch to the selected needle point, Del deletes. , and . step from needle point to needle point in sewing order (with Shift ten at a time), Home and End jump to the start and the thread end of the object; the line above the stage says which needle point is selected. Shift+drag selects a rectangle, Ctrl+A everything, and Thin out under Tools loosens the selection by 25, 33 or 50 %: in a fill the selected rows are laid anew at a wider spacing, evenly, with their ends on the edge; in a line the same share of needle points goes, the same ones on every pass; the object stays one. A click on another object continues with it; Esc leads back to the objects.
Two marks show where the object starts and where its thread ends: a round dot with an arrow in the direction of sewing (Start) and a square (End). A selected needle point shows its way: the stitches before and after it in sewing order, fading to the sides, with small arrows in the direction the thread runs. So you see where the needle comes from and where it goes, even in the middle of a fill. Pointing at a needle point shows the same way faintly, before the click.
Stitch on (W) in the line above the stage sets needle points by clicking: each click sets a new needle point after the selected one, or at the object's thread end when none is selected, and the new one is selected then, so you stitch on click by click. A line from the last needle point to the pointer shows beforehand how long the stitch will be; in the middle of an object a dashed line shows how the thread goes on afterwards. A click close to an existing needle point hits exactly that hole. A stitch over 12 mm is split into stitches of equal length, as a machine can sew them. At the thread end the tie-off goes along, so the thread stays locked where it now ends. Dragging moves the view meanwhile, Backspace takes back the last needle point, Enter or Esc end it. Each click is one step for Ctrl+Z.
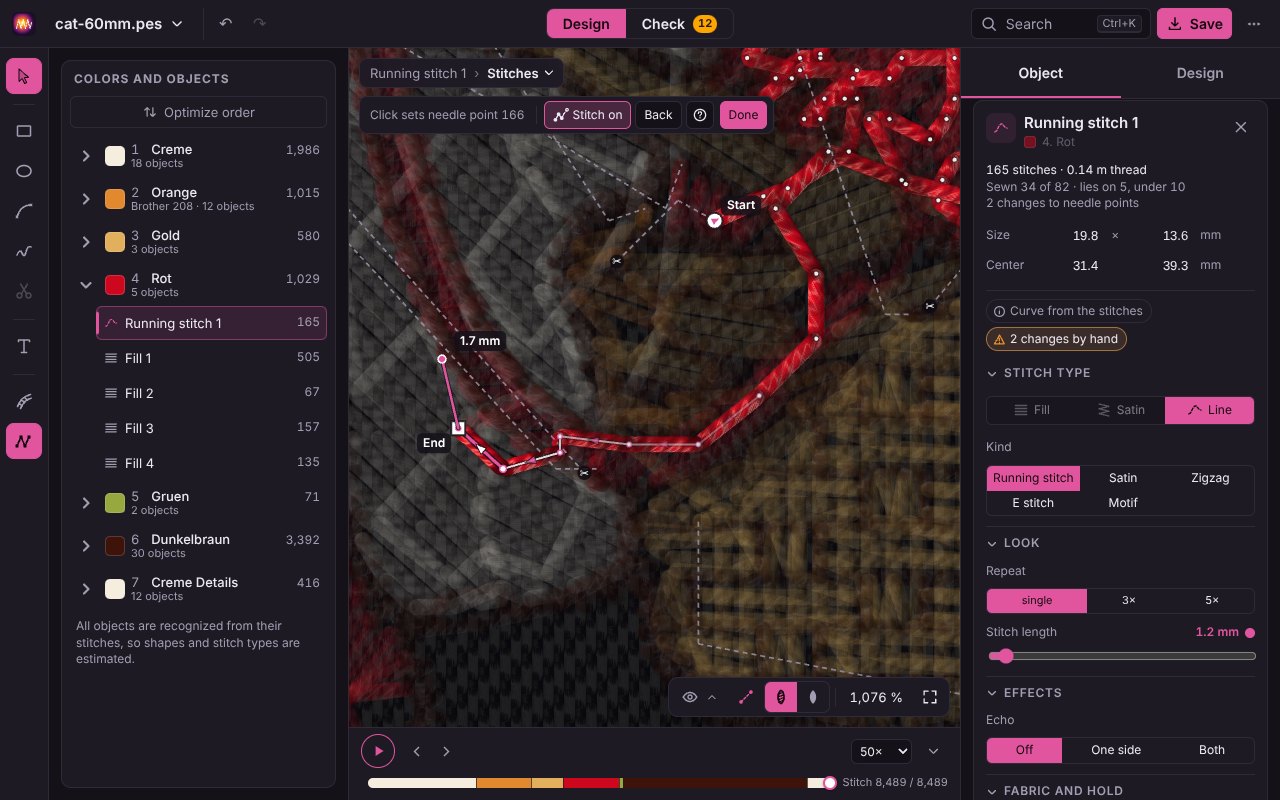
The object keeps its shape, cohesion and settings, and its card counts the changes by hand. New stitch settings, another stitch type or combining sew it anew from its shape and replace these changes; the card says so beforehand, and Ctrl+Z brings them back. For changes by hand to stay for good, loose the stitches from the shape. In Check the selection may span several objects, see Correction by hand.
Draw shapes
The tools on the left of the stage make new shapes, sewn at once with the settings for your material. Each new shape is sewn right after the selected object in its thread, after the last one with nothing selected. Start empty on the start page or New in the Designs menu makes an empty design first, with the fabric and thread used last and the hoop 100 × 100 mm when none is chosen; it is called New design until you rename it with the pencil.
- Tools
- Rectangle (M) and Ellipse (O): drag them open; Shift or the switch As wide as tall makes a square or a circle, Alt or From the center draws from the center, a tag shows the size. Path (B): click for corners, drag for curves; a click on the first node closes an area (fill), double click or Enter ends an open line (running stitch), Del takes the last node back. Freehand (P): drag a line; it is smoothed on release and sewn as running stitch. After a shape, Select (V) is back and the new shape is chosen, with its frame and nodes, ready to be moved or reshaped; Esc puts a tool away too. Every shape is one step you can undo.
- Go on with the shape
- A drawn area is a fill with all stitch settings, a line a running stitch that can also become satin or fill. With Cut out the top shape you punch holes, with Combine into one object you join areas, with Cut apart you split them, and on the Shape level you bend every outline further.
- Shapes instead of stitches
- The switch Stitches | Shapes at the bottom right of the stage (key S) shows fills as flat color areas and lines as a band of their width. That keeps the stage calm while you arrange many shapes.
Tracing image
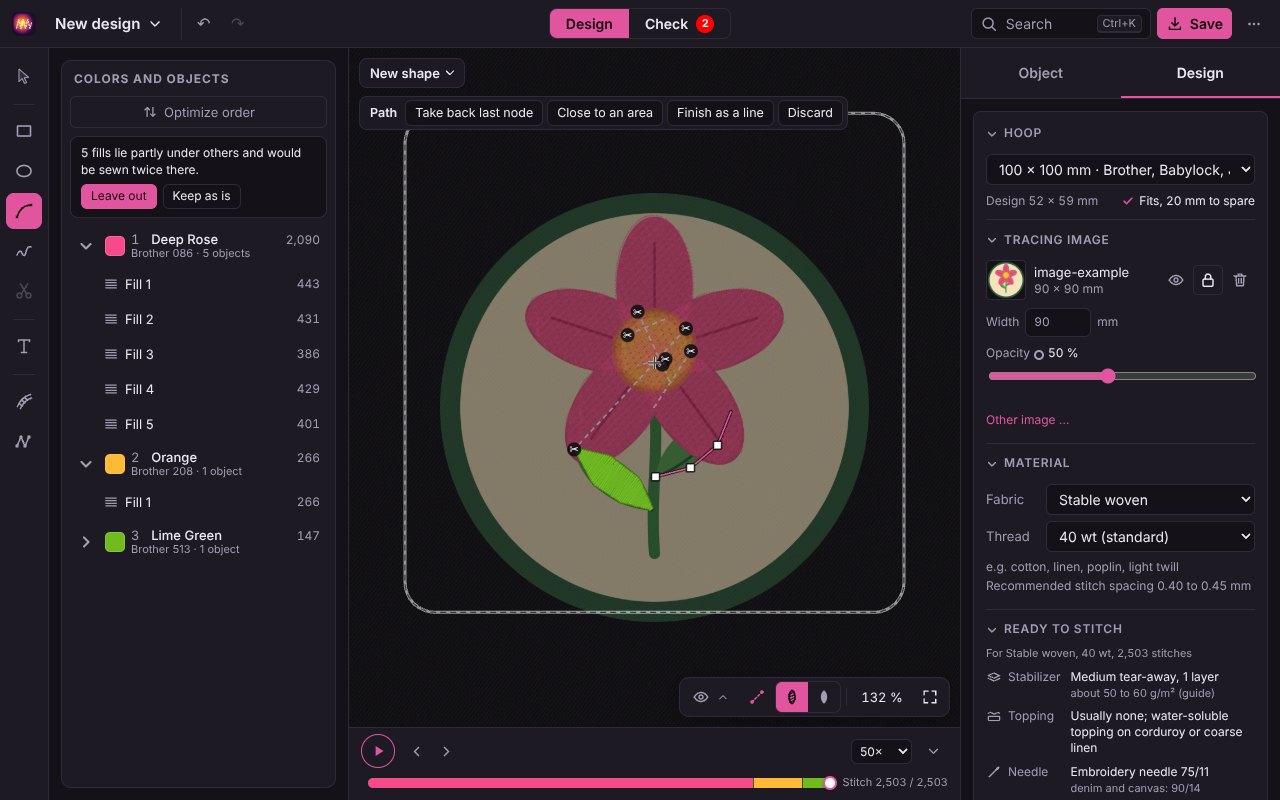
A picture can lie under a design so you can draw along it with the tools. It lies dimmed under the stitches and is never sewn: the hoop, the check, the sewing time and the file for the machine do not see it. On the Design tab, Tracing image with Choose image … takes a PNG, JPG, WebP or SVG; it is laid in the middle, as large as fits the hoop.
- Move and size
- While the image is unlocked, a dashed frame lies around it: dragging inside moves it, dragging a corner sizes it, keeping its aspect ratio. Objects under the pointer come first. Width in mm sets the size exactly. Every change is one step to undo.
- Eye, lock, bin
- The eye hides and shows the image (Shift+B), the lock keeps it from moving while you draw, the bin removes it (undoable). Other image … swaps the picture.
- Opacity
- The slider sets how strongly the picture shows through, from 10 to 100 %. The default is 50 %: enough to draw along without the picture competing with the stitches. Less makes the stitches stand out, more shows fine detail. The dot next to the value goes back to 50 %. The opacity belongs to the design but is no step to undo.
- From Convert a picture
- In the first step of Convert a picture, Trace only lays the cropped picture at the chosen width under the active design (under a new one if none is open) instead of making stitches from it. A converted design keeps its picture as its tracing image anyway, exactly under the stitches, hidden and locked: one click on the eye shows how the stitches meet the picture.
- Saved
- The tracing image belongs to its design: it is still there after a reload, it is in the project file (also with Only this design), and it comes back on opening with its place, size, opacity, eye and lock.
Lettering
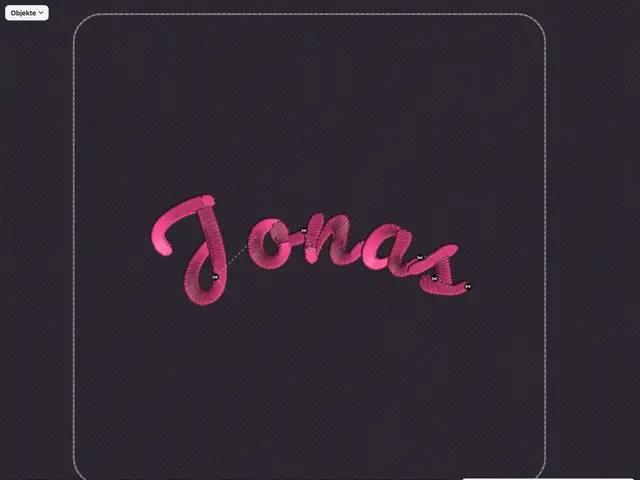
Text in the tool bar (T) puts a lettering under the design or starts a new one with it. Its text is selected, you can type right away. The lettering stays text: words, font or height can be changed later, and the letters are sewn anew in the same place, in the same thread and in the same order.
- Font: the list shows every font with your text. Notes say what a font lacks for it (an ä or ß, capitals only) and from or up to which height it looks good. In the open list the arrow keys try one font after the other right on the design. If a letter is missing, the card names fonts that have them all.
- Height of the capitals in millimeters, as tall as a capital H. The green band under the slider shows the heights the font is made for; outside it a note says what happens and suggests better fitting fonts. Satin columns keep their density at any height, they are sewn anew along their rails.
- Alignment for several lines (Enter in the text field starts a new line), Shape straight, in an arc up or down or around a circle, with its radius.
- Thread: at first the last thread of the design, so no color change is added. Another thread gets its own color.
- More: letter, word and line spacing, rotation, density relative to the font, underlay and lines back and forth (shorter travel).
- Contour around: a line at a distance around the whole lettering, say as the edge of a patch; distance, handle and what the contour can become are described under Objects.
On the stage a lettering is an object: a click selects it, the frame moves, rotates and scales it (scaling sets its height, it is sewn anew), the arrow keys nudge it. A double click leads to its text. In the list it stands as one object per letter, each with its stitches. Single letters (or Enter) shows a box around each letter: dragging moves it, the arrow keys nudge the selected one, a slider turns it. That is how you kern a pair by hand. Esc goes back to the lettering.
Letterings are kept in the browser and in project files. Embroidery files store only the stitches: opened from there again, the letters are ordinary objects. Convert to objects does that on purpose, say to edit single stitches. If the lettering does not fit the chosen hoop, a note says so next to its size.
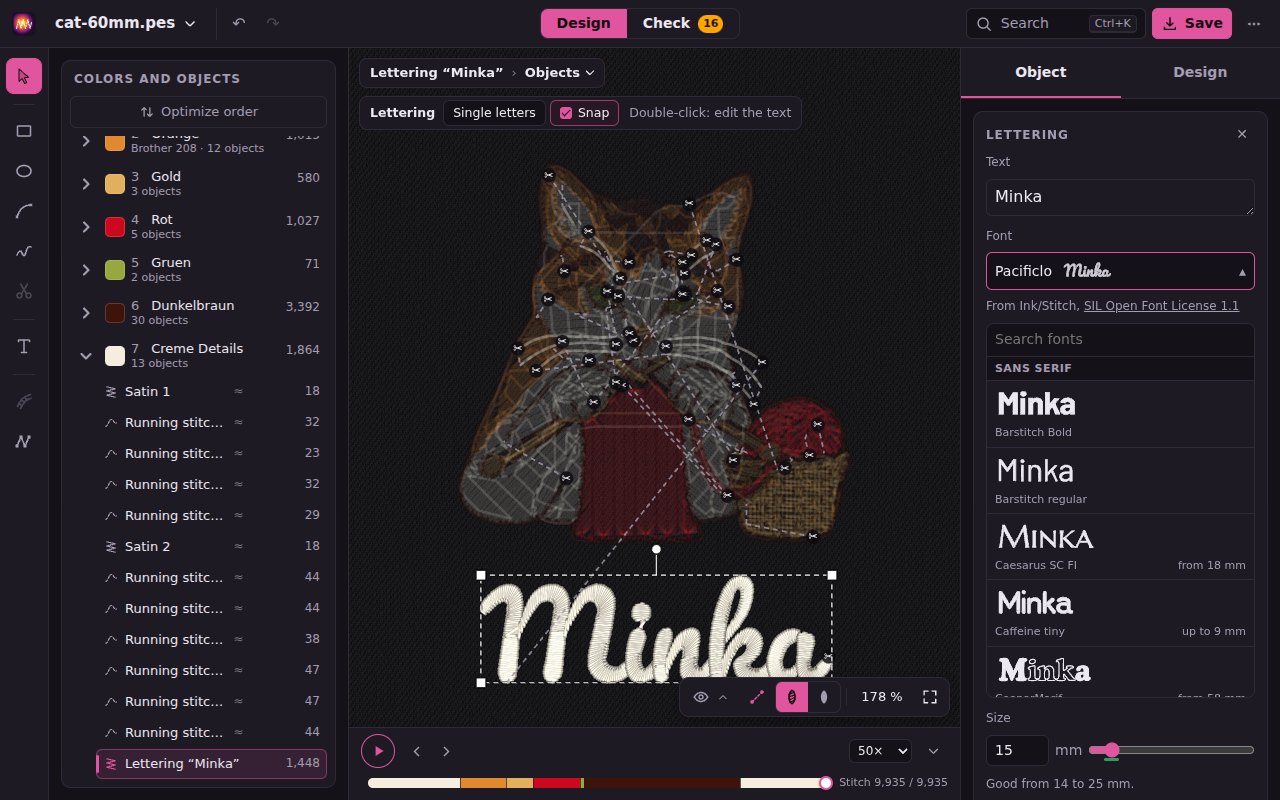
The 41 fonts and their licenses
The fonts come from Ink/Stitch (commit c7e3a05), converted for heatstitch. Only fonts whose license allows use and distribution in an MIT-licensed app are included: SIL Open Font License, CC BY and public domain. Every license text is linked; the fonts may be used for your embroideries, commercially too.
| Font | Style | Good height | License |
|---|---|---|---|
| AGS Γαραμου Garamond | Serif | 15–29 mm | OFL 1.1 |
| Allegria 20 | Script | 10–40 mm | OFL 1.1 |
| Allegria 55 | Script | 22–77 mm | OFL 1.1 |
| Amitaclo | Script | 18–36 mm | OFL 1.1 |
| Apex Simple AGS | Serif | 24–42 mm | OFL 1.1 |
| Art Nouveau | Serif | 19–35 mm | OFL 1.1 |
| Auberge Marif | Script | 21–50 mm | OFL 1.1 |
| Barstitch Bold | Sans serif | 12–31 mm | OFL 1.1 |
| Barstitch regular | Sans serif | 12–36 mm | OFL 1.1 |
| Bathaus FI | Decorative | 24–45 mm | OFL 1.1 |
| Caesarus SC FI | Sans serif | 18–126 mm | OFL 1.1 |
| Caffeine tiny | Sans serif | 4–9 mm | OFL 1.1 |
| Cats | Decorative | 28–60 mm | OFL 1.1 |
| Chicken Little KOR | Serif | 16–63 mm | OFL 1.1 |
| Chicken Scratch | Script | 15–22 mm | OFL 1.1 |
| Cogs KOR | Decorative | 30–46 mm | CC BY 4.0 |
| CooperMarif | Sans serif | 58–348 mm | OFL 1.1 |
| Digory Doodles Bean | Script | 18–37 mm | OFL 1.1 |
| Excalibur KOR | Sans serif | 9–24 mm | Public domain |
| Fold Ink/Stitch (capitals only) | Decorative | 51–379 mm | OFL 1.1 |
| Glacial Tiny 60 AGS | Sans serif | 3–8 mm | OFL 1.1 |
| Magnolia KOR | Script | 16–24 mm | OFL 1.1 |
| MAM Script | Script | 18–46 mm | OFL 1.1 |
| Manga Impact | Sans serif | 8–41 mm | OFL 1.1 |
| Marifenda | Script | 24–48 mm | OFL 1.1 |
| Millimarif-bold20 | Sans serif | 16–30 mm | OFL 1.1 |
| Mimosa Medium | Decorative | 21–42 mm | OFL 1.1 |
| Montecarlo | Script | 27–50 mm | OFL 1.1 |
| Néon blinking | Decorative | 20–58 mm | OFL 1.1 |
| Pacificlo | Script | 14–25 mm | OFL 1.1 |
| Paquerette | Decorative | 23–28 mm | Public domain |
| Pisankris | Decorative | 20–40 mm | OFL 1.1 |
| Pixel 10 | Sans serif | 25–76 mm | OFL 1.1 |
| Roaring Twenties KOR | Decorative | 11–23 mm | OFL 1.1 |
| Roman AGS | Serif | 20–33 mm | OFL 1.1 |
| Sacramarif | Script | 13–24 mm | OFL 1.1 |
| Stebor AGS | Script | 16–30 mm | OFL 1.1 |
| TT Directors | Sans serif | 9–26 mm | OFL 1.1 |
| TT Masters | Sans serif | 9–27 mm | OFL 1.1 |
| Violin Serif | Serif | 23–34 mm | OFL 1.1 |
| Кирилиця | Sans serif | 8–28 mm | OFL 1.1 |
Check
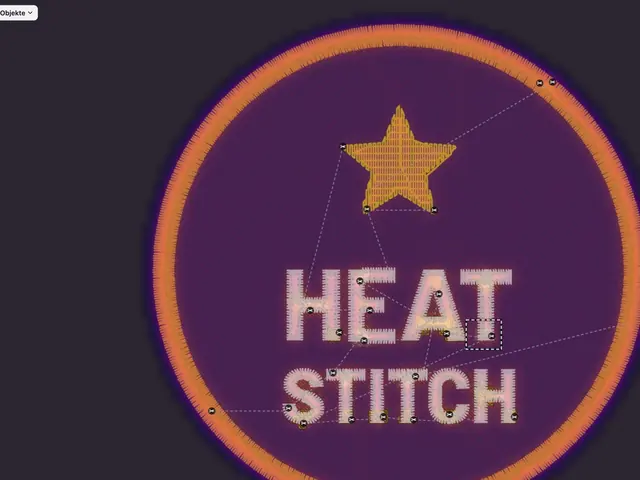
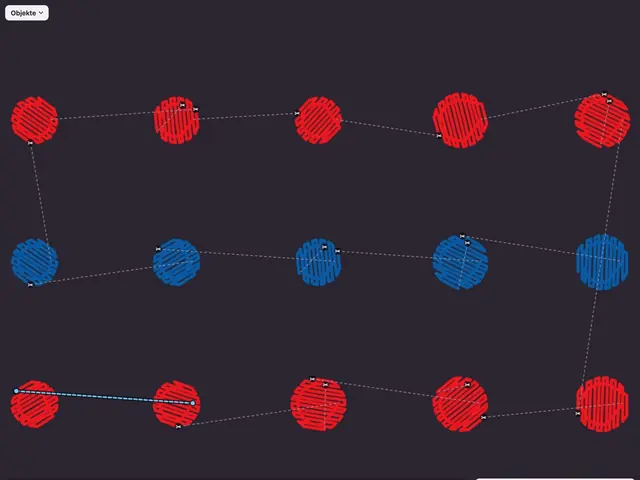
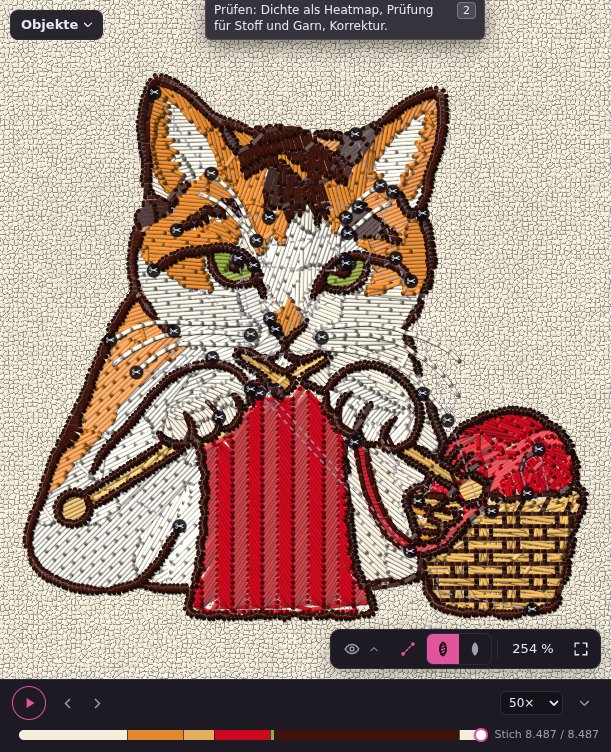
Check (2) shows the design as a density map and tells whether it will come out well on your fabric. The check runs as soon as a file is loaded; the tab at the top carries the number of open findings. Fabric and thread are set in the Design card under Material; they belong to this design and are saved with it. The limits apply to 40 wt on stable woven fabric and are scaled for the chosen material: knit, terry, delicate fabrics and leather take less, fine thread a little more, thick thread much less. How the check works in the Design card explains every rule with the numbers for your material and lets you switch single checks off.
Will it stitch?
The light at the top of the card says in one word how it will go: Good, With care or Risky, for the chosen fabric. The row of fabrics below (woven, denim, cap, knit, fleece, terry, light, sheer, leather) shows the verdict for each; a click checks for that fabric. It turns red when one connected critical spot is larger than a few square millimeters; many small spots make yellow at most, and spots that are normal in practice or acknowledged do not count. Below, one row per kind says what counts: Density, Penetrations, Gaps and Long stitches, with the area in mm² and the number of spots; a click jumps to the worst one.
Find fixes works out a fix for each kind (for large designs this may take up to about a minute, which is why it starts on a click). Then every row shows what can be fixed: Fix changes only what does not or hardly shows, in the whole design and in one step; Fix everything takes all kinds together. In Design a hint Changed by the correction in the Object card then says in words what Fix set on an object. Whatever remains afterwards can only be fixed visibly: Proposal shows before and after side by side, and only Apply changes anything. Take back correction gives the changed objects exactly their stitches and settings from before, even after saving, until you change an object yourself.
Findings
| Check | Finds | Caution / Critical (woven, 40 wt) |
|---|---|---|
| Thread density | Too many layers on top of each other, the main check | 7 / 12 mm/mm² for fill stitch, up to 15 / 17.5 for pure satin |
| Short-stitch cluster | Thread lumps, knots | 8 stitches under 1 mm in one cell: caution on woven fabric and caps, critical on other fabrics |
| Perforation (leather only) | Holes so dense that they weaken the material | 6 / 9 holes within 1 mm |
| Coverage and gaps | Fabric shows through a layer that is too loose; a gap opens between two objects when the thread pulls the fabric together | caution only |
| Long stitches | Stitches that can snag | caution only, from 10 mm on woven fabric, 7 to 8 mm on other fabrics |
Density is measured on a fine grid, and every 1 mm cell takes the peak. That way narrow columns like lettering are not averaged away. Connected flagged cells form a zone; its level is that of its worst cell. Under Findings the zones stand as a list, with the filters All, Critical, Caution and Fine; a click on a zone zooms to it, N and Shift+N step through them, V hides the markers on the stage. Hovering shows the check value and the limits that apply there in the tooltip.
Some findings are normal in practice: small spots (satin ends, joins, turning points), compact satin joins where two columns meet, and short-stitch clusters on woven fabric and caps. They stay in the list, marked grey, but do not count towards the verdict, and the correction leaves them alone. Check anyway counts one of them again. Any other zone can be acknowledged if it should stay as it is. Perforation always counts.
Heatmap
- Thread length (mm/mm²)
- Every stitch is distributed exactly over the grid cells it crosses. Too much of it makes embroidery stiff, wavy or board-like. One fill layer at 0.4 mm spacing has 2.5 mm/mm².
- Needle points (1/mm²)
- Needle holes per area. Important on leather, faux leather and delicate fabrics.
- Grid cell, smoothing, scale maximum
- Under Fine settings in the Heatmap section. They only change the picture, never the check. The color scale is absolute, so two files with the same maximum compare directly. Count untrimmed jumps as thread includes loose jump threads.
- Stitch plan
- Show stitch plan draws the stitches in thread colors over the heatmap, with Realistic threads as round, twisted threads with shadows. The markers (jumps, trims, needle points) appear with it.
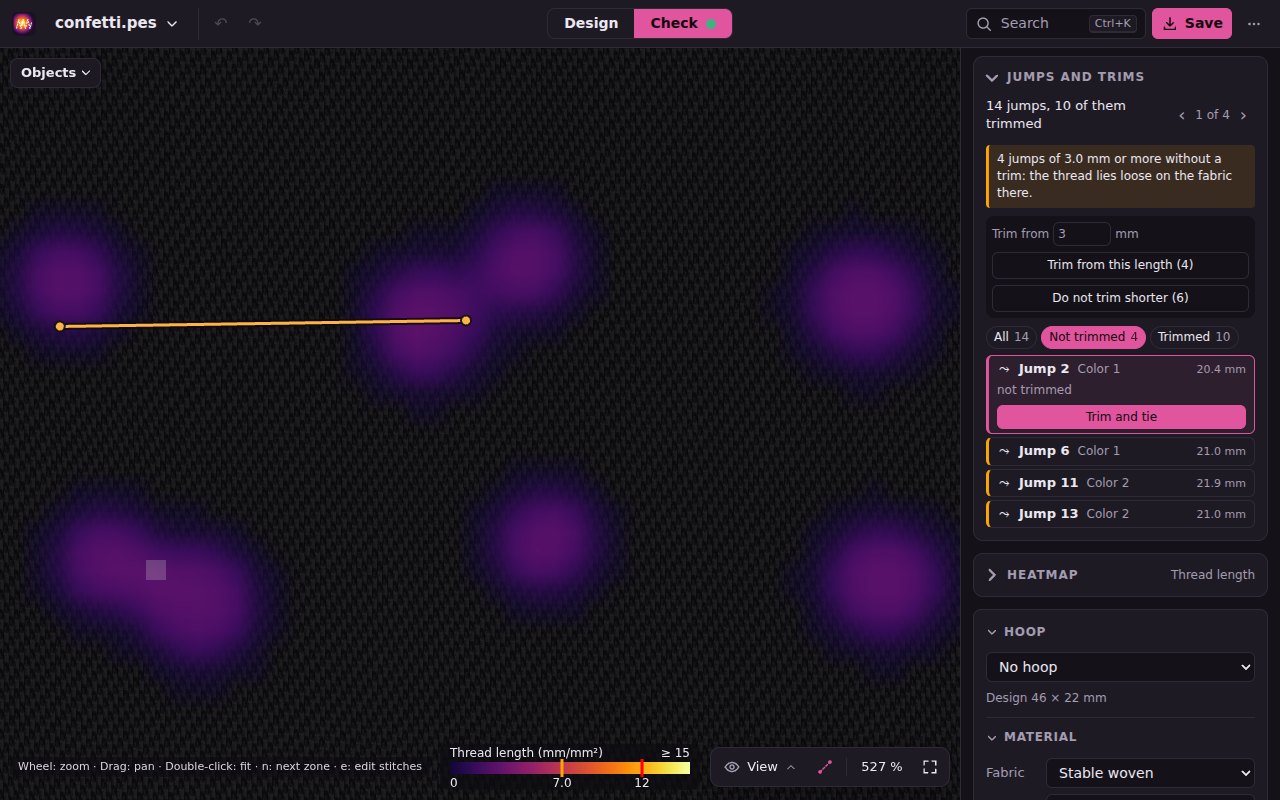
Jumps and trims
The Jumps and trims section shows every jump between two stitch runs of one color, with its length and whether the machine trims there. Color changes are not listed, the machine stops there anyway. A click on a jump in the list or on the stage shows it. The switches All, Not trimmed and Trimmed above the list show only the jumps you are after.
- Trim and tie: a few tie stitches secure the thread before the jump, the thread is cut, and tie-in stitches start the next run. Existing tie stitches are recognized and not set twice.
- Don't trim: trim and tie stitches around the jump are dropped, the machine carries the thread. That saves time on short jumps that are sewn over later.
- All at once by length: Trim from this length trims every untrimmed jump from the chosen length, Don't trim shorter removes the trims below it. A note warns when long jumps are left untrimmed, because the thread then lies loose on the fabric.
DST writes a trim as three jumps, PES with its trim flag; both read back the same. What JEF makes of it is under Save.
Correction (beta)
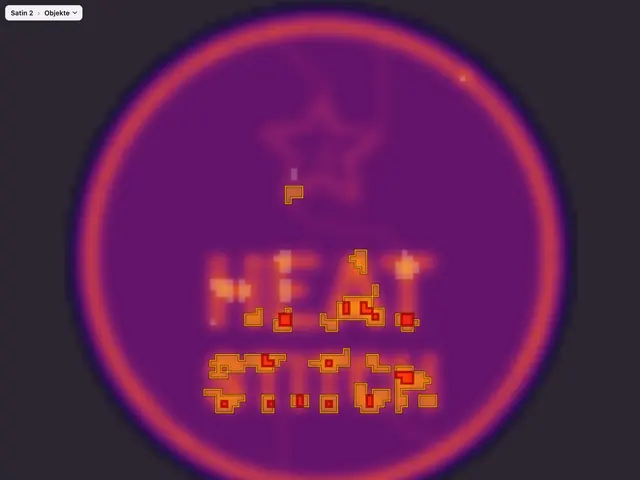
The light fixes the usual things in one click. The Correction section below it is the toolbox behind that, for everyone who wants a say. It is a beta feature and is still being improved: check the result in the compare view and do a test stitch-out before sewing.
Proposals
Choose the goal (Critical only, the default, or No warnings) and the focus (Both, Thread density or Hole density) and press Propose corrections, optionally with Zone only for the selected zone. The correction thinks like a digitizer: it does not push stitches around but looks for better settings for every affected object, tries them on the spot and keeps only what makes the result better. Stitch type, pattern and shape always stay. Nothing changes before you choose, and a loaded embroidery file is never changed on loading.
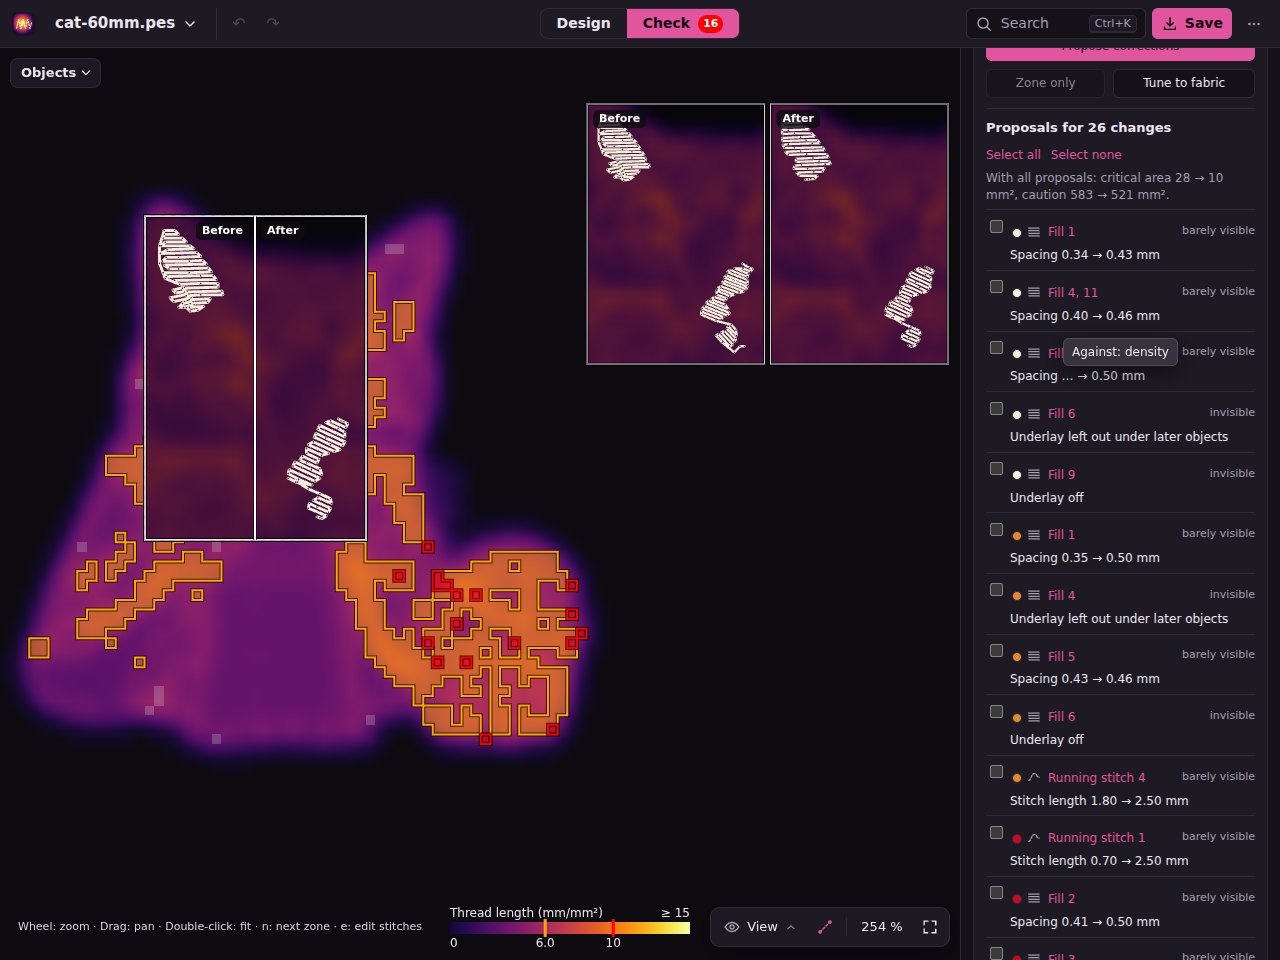
The card has one row per object with its thread, how visible the change is (invisible, barely visible, visible), what it changes, say Spacing 0.41 → 0.48 mm, and what it helps against. At first nothing is ticked: with the pointer on a row the stage compares before and after. Inside the object's frame the left half shows it as it is, the right half as it would be; a small object also appears enlarged at the top of the stage. Moving the pointer sideways over the row moves the divider. A click on the name holds the comparison and zooms to it; a second click or Esc releases it. Tick what you want, or Select all. Apply selected takes over the ticked rows in one step, and one undo takes everything back. Afterwards the new values stand in the object's stitch settings, with a note on what the correction changed.
- Underlay: none under small fills and narrow satins, center walk instead of zigzag under narrow columns, single instead of crossed, and left out where later objects cover the fill.
- Leave out under later shapes; under a satin edge the fill still reaches in by a share of the edge width.
- Satin: short stitches in curves, spacing by width, long stitches split.
- Spacing up to the value recommended for the material, never beyond; where fabric shows through or gaps open, a tighter spacing or an underlay.
- Edges (pull compensation) a little wider where the rows leave gaps at the outline; running stitch: stitch length.
Where no setting helps or the shape of a foreign file is recognized uncertainly, the row Fine correction on the stitches shortens fill ends, thins covered rows and separates needle points by at most 0.3 mm. Zones that are normal in practice or acknowledged stay as they are.
Tune to fabric
Tune to fabric shows which settings fit the chosen fabric and thread better: spacing in the recommended range, underlay by size, long satin stitches split, pull compensation by fabric. Pick another fabric, and the card comes on its own. Whatever is made in heatstitch (converted pictures, drawn shapes, lettering) gets these rules from the start.
By hand
Stitches by hand (E) in Check: zooming in shows the needle points. Click selects, Shift+drag selects a rectangle, Ctrl+A everything. Then drag, nudge with the arrow keys, insert by double click, delete, or thin the selection out by 25, 33 or 50 %. Unlike in Design, the selection may span several objects here.
Compare
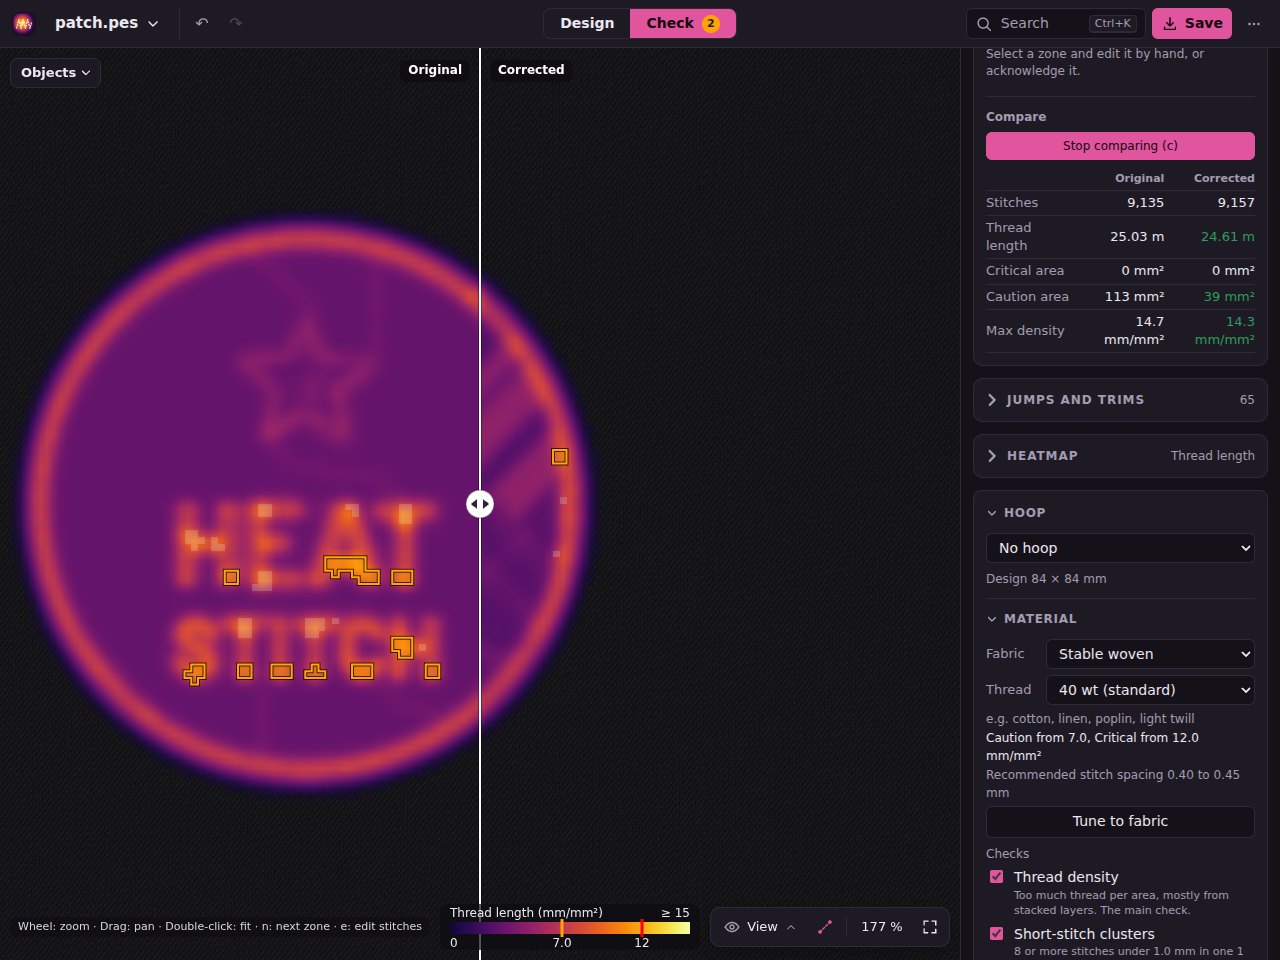
Once something has changed, Compare with original (C) splits the view: the original on the left, the current version on the right, with a draggable divider and a table with stitches, thread length, flagged area and peak density.
Convert a picture
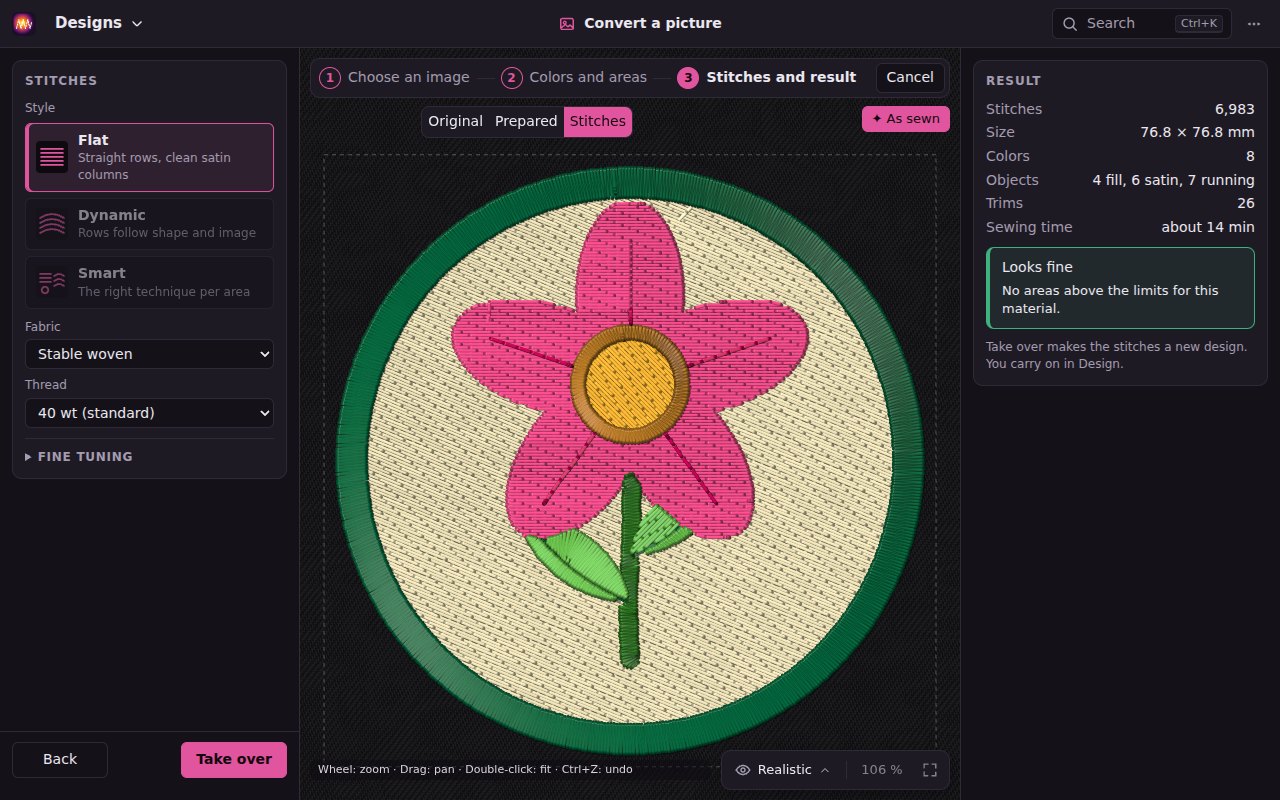
Convert a picture (on the start page, in the Designs menu or 3) turns any picture into a design: PNG, JPG, WebP or SVG, logos as well as photos. The wizard leads through three steps, Back and Next switch, Cancel returns to Design, and picture and settings stay for later.
- 1. Choose an image
- Drop the picture into the box or press Load example image. After loading, this step stays open, and a frame lies around the picture: dragging its corners and edges crops it, dragging inside moves the cut, the outside is dimmed. Only what lies inside the frame is sewn. Crop to motif cuts away a plain or transparent border around the motif by itself, Whole image removes the crop. Width in mm sets the size of the design and applies to the cut, the height next to it follows while you drag. The picture itself stays whole, so the frame can be widened again later; Ctrl+Z undoes a crop, and it is saved in the project. For photos, Prepare the image with AI suggests a way: upload the picture to your own AI chat that can edit images, paste the ready-made prompt (it follows the width and color count) and load the result here. heatstitch itself sends nothing away.
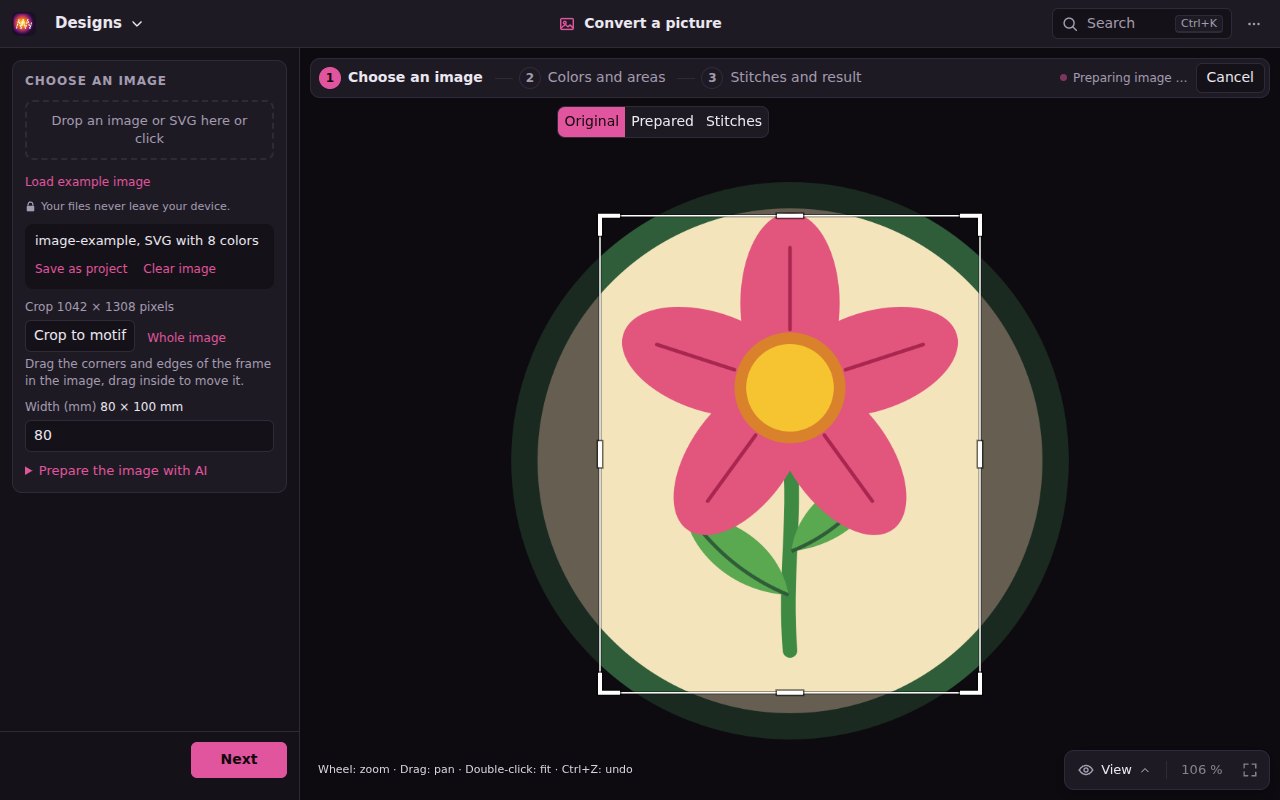
The frame around the flower: what lies outside is dimmed and not sewn. On the left the crop in pixels, and the Width applies to the cut. - 2. Colors and areas
- The picture is reduced to a few thread colors (Most colors): similar colors are merged, small conspicuous ones like eyes stay. Simplify smooths photos into flat areas while keeping the edges; for photos it switches on by itself. Areas under Smallest area merge into their neighbor, thin anti-aliasing seams vanish, and Leave out background keeps the edge free. With Brother thread colors every color becomes the nearest thread of the palette. In the Colors list the tick leaves a color out, the color field picks another thread, and → merges it into another; a ≠ warns that no thread is close to the picture's color. With the brush (Paint, Erase) you recolor areas by hand or take out what should not be sewn. The stage meanwhile shows Original, Prepared (the picture as it will be sewn) or Stitches.
- 3. Stitches and result
- The Style decides how the areas are sewn. Flat (default) sews every area with straight rows at one angle, calm and even like a logo. The chosen style shows a small ring beside its name until the stitches are ready; Smart takes a few seconds for that, and changing the technique of one area afterwards waits only for that area. Dynamic lets the fill rows follow the picture, like fur, hair or strokes, in plain areas along the shape; where the direction changes within an area, the rows curve. Smart gives every area the technique that suits it: calm areas straight rows, small round areas satin across, areas with fur or hair rows that follow the picture, strokes satin columns, and shapes such as a star, a leaf, a drop, a frame or a block letter Satin in sections: cut the way a digitizer cuts them by hand, spikes from the base to the tip, frames on the miter at their corners, leaves along their vein, with satin up to Satin up to width. The technique can also be chosen for strokes and lines that branch or close. The Areas list shows every area with its letter in the picture and its technique; there you change a row, and Smart goes back to what Smart chooses. Fabric and Thread are the material that spacing and pull compensation follow; under Fine tuning are own values for them, Satin up to width and the Max. deviation. Every area gets the stitch that fits its shape: wide areas tatami fill with underlay, narrow strokes satin columns, lines under 1 mm running stitch. The largest color is sewn first, touching objects overlap by 0.2 mm, long jumps are trimmed with tie stitches.
- Result
- The Result card names stitches, size, sewing time and the light for the material; if the design does not fit the chosen hoop, it says so here. Take over makes it a new design and returns to Design; the picture stays as a hidden tracing image exactly under the stitches. There it can be viewed, edited, checked and saved for the machine; its objects keep their shape and settings.
- SVG files
- An SVG dropped on the window opens in Design, sewn shape by shape in the order the file paints them: every shape stays whole, even where another covers it, and keeps its curves for the Shape level. Overlaps are offered for leaving out, never removed unasked. Opened under Convert a picture, an SVG is read as shapes too: every color of the file becomes a thread (a gradient its middle color), shapes keep their exact outline, and what lies hidden under other shapes is left out. A size in mm, cm or inches becomes the width. A shape with fill and stroke becomes a fill with a border in the stroke's thread. Lines become running stitch or satin by their width; lines thinner than 0.4 mm are sewn as running stitch instead of getting lost. SVGs with text, clip paths or masks are sewn from their colors; SVGs with embedded photos or more than 48 colors are treated like a picture.
- Max. deviation
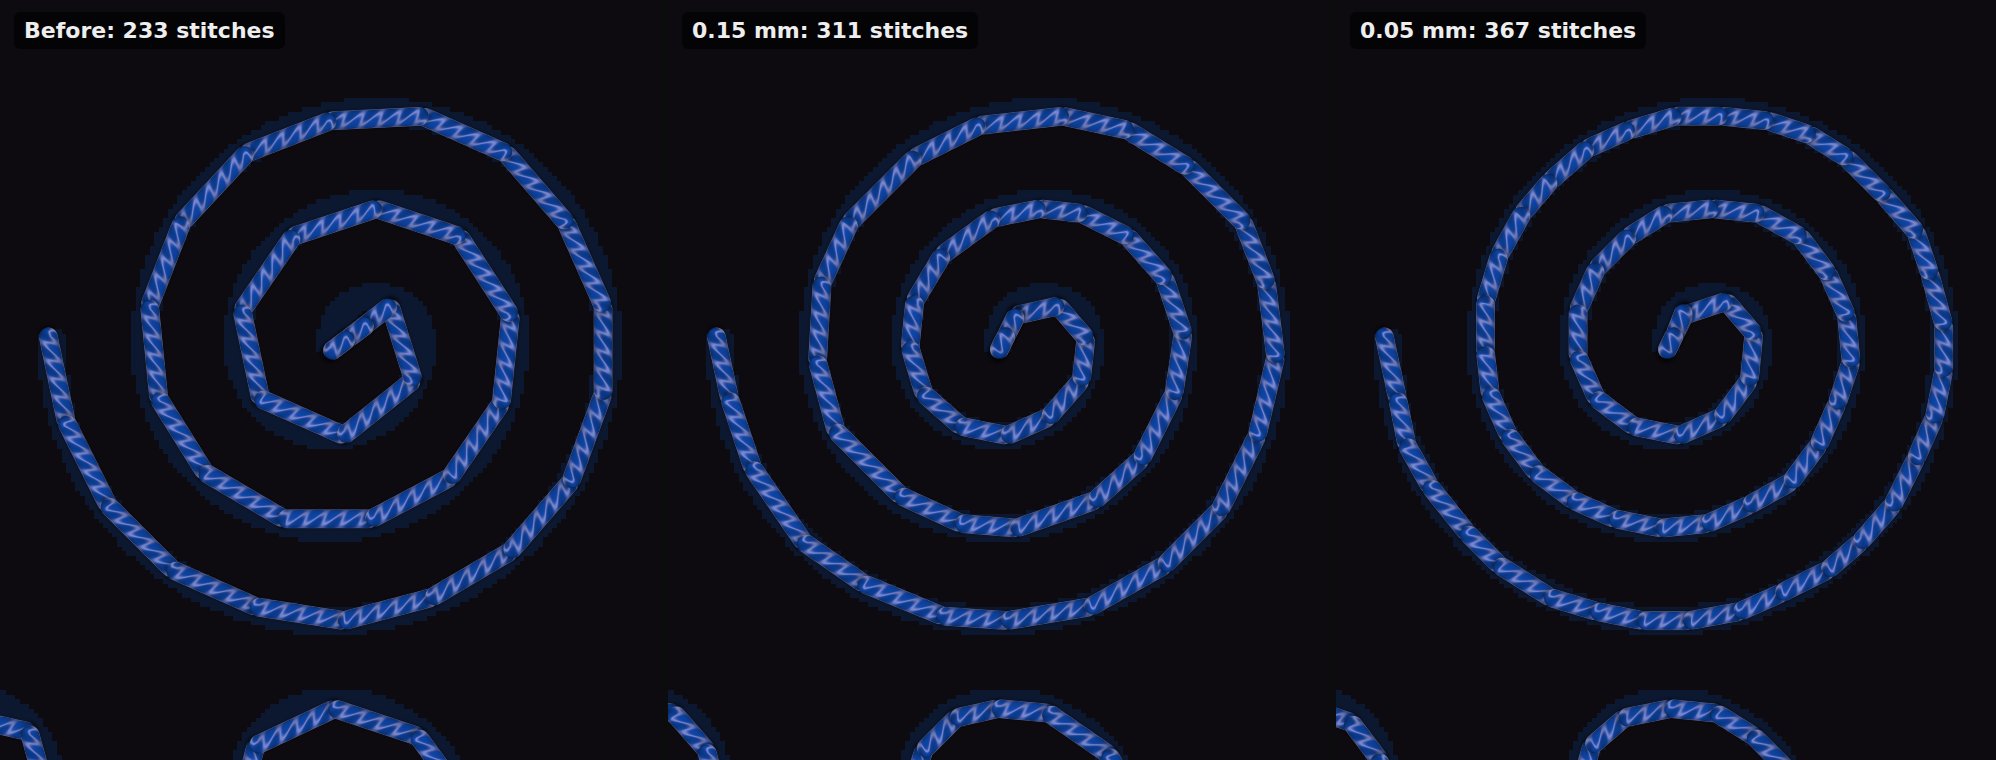
- How far a stitch may lie beside the line or edge it follows at most. A straight stitch cuts every curve short. Running stitches, the walk under narrow satin columns and curved fill rows therefore get shorter stitches in tighter curves until none lies further off. Straight stretches keep their stitch length, and no stitch gets shorter than 1 mm. The default is 0.15 mm; smaller makes curves more exact and costs stitches, larger saves stitches.
View
The eye at the bottom right of the stage opens the View menu. It applies in Design and Check.
- Realistic threads
- Round, twisted threads with shadows (WebGL2), as wide as the Thread width, which follows the thread weight of the material. Real thread shines across its fibers: with Light follows pointer and tilt the light comes from the direction of the pointer or the tilt of a phone, and satin columns and fill rows light up by their stitch direction, like turning a patch in your hand. When converting a picture the light sweeps around once at the first result; As sewn brings that back.
- Color stitches by
- Thread color, Order, Stitch type or Stitch length, see Sequence and colors.
- Background and fabric
- Background is the color behind the stitches, say that of the garment, an own one too. Fabric adds the material with light and shadow like the threads: woven, cap, knit, terry, light fabric or leather. It is the same material as in the Design card; a choice here changes the check as well. Both are saved in the project.
- Markers
- Jumps dashed, Loose jump threads (jumps without a trim, drawn as the thread will lie over the fabric), trims (✂), numbered color changes, start and end, and needle points once you are zoomed in far enough. H hides them all at once and keeps your choice; loose jump threads stay, as that is how the thread lies. A jump can only be clicked on the stage while its line is shown.
- Stitches or shapes
- The switch Stitches | Shapes at the bottom right of the stage next to the marks (key S, also as Shapes instead of stitches in the View menu) shows fills as flat color areas, satins as whole areas and drawn lines as a band of their width, for arranging many shapes, echo and shadow too. The eye button then says Shapes, so flat areas do not look like a fault.
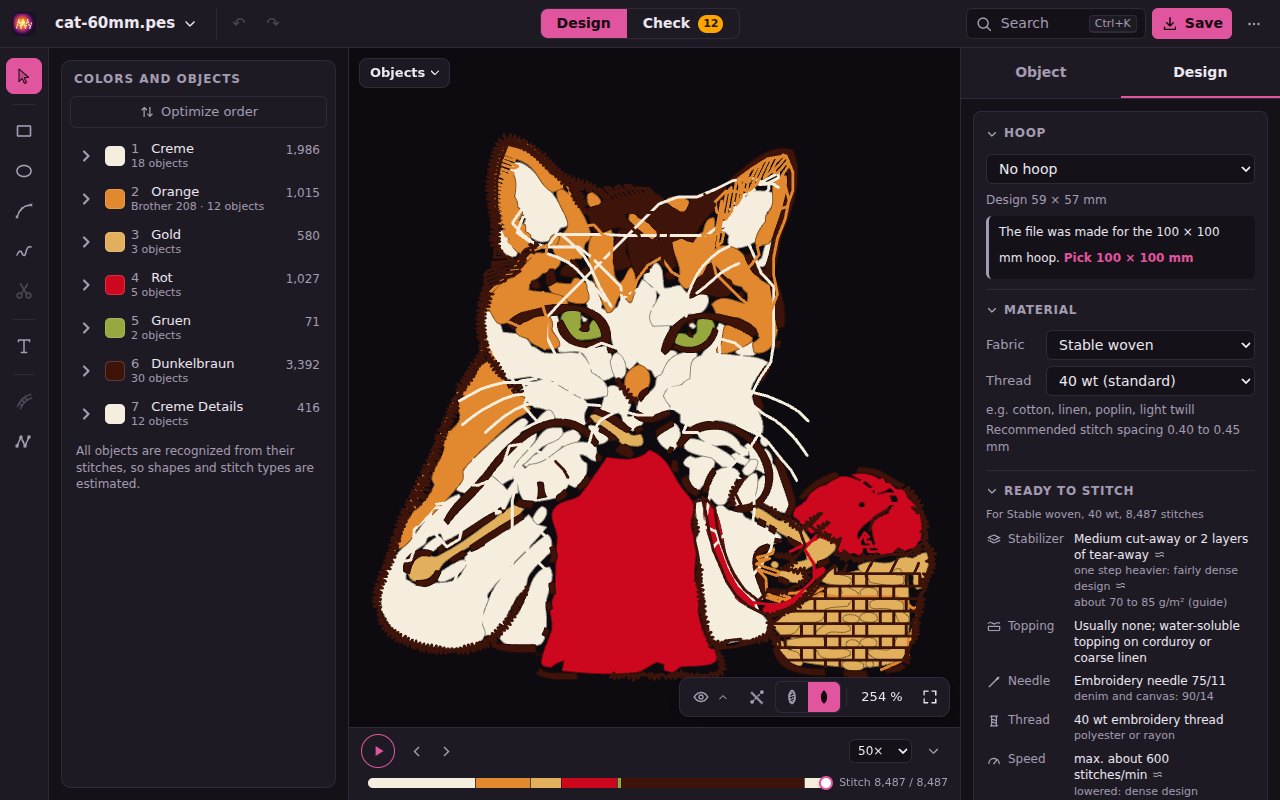
The cat as shapes: every fill and satin a flat area, the marks hidden with H. At the bottom right the switch Stitches | Shapes next to the eye. - Auto highlight
- The button between the marks and Stitches | Shapes (key A): on, what you point at and what you selected stands out and the rest fades. Off, nothing fades, neither when pointing nor for the selection, so you always see the whole design. A color you highlight in the list stays highlighted.
- Preview on hover
- When you point at a pattern, an underlay, an emboss motif or a proposal, the stage shows the result before you click. Large areas are sewn for it in the background, also on a click: the page stays responsive, and what counts is always what you point at right now; the pointer spins while it works. After pointing, a click takes the finished preview over at once. If you prefer it calmer, switch off Preview on hover in the View menu: the stage then only changes on a click. Dragging a slider still shows the stitches live.
- Zoom
- Mouse wheel, pinch or + and -; 0 shows the design at actual size, F or a double click on an empty spot fits it in. With a hoop chosen, Fit shows the whole sewing field.
- Scale bar
- At the bottom left of the stage a black and white bar shows how large the design is at this zoom: two parts of 1, 2.5 or 5 mm times a power of ten (… 1, 2.5, 5, 10, 25, 50, 100 mm …, down to 0.1 mm when zoomed in close), at most 120 pixels wide. Switch it off with Scale bar in the View menu.
- Measure
- The ruler in the bar at the bottom right (key L) measures the distance between two points in mm: drag, or click or tap two points one after the other. The length stands at the line, width, height and angle above; the angle counts as for a fill. The ends can be moved afterwards, a click elsewhere measures anew. From about 160 % zoom the ends snap to needle points, so you measure exactly one stitch length (Alt: place freely); Shift holds the line to 15° steps. Esc clears the measurement, Esc again or Done puts the tool away. Measuring changes nothing in the design and works in Check too.
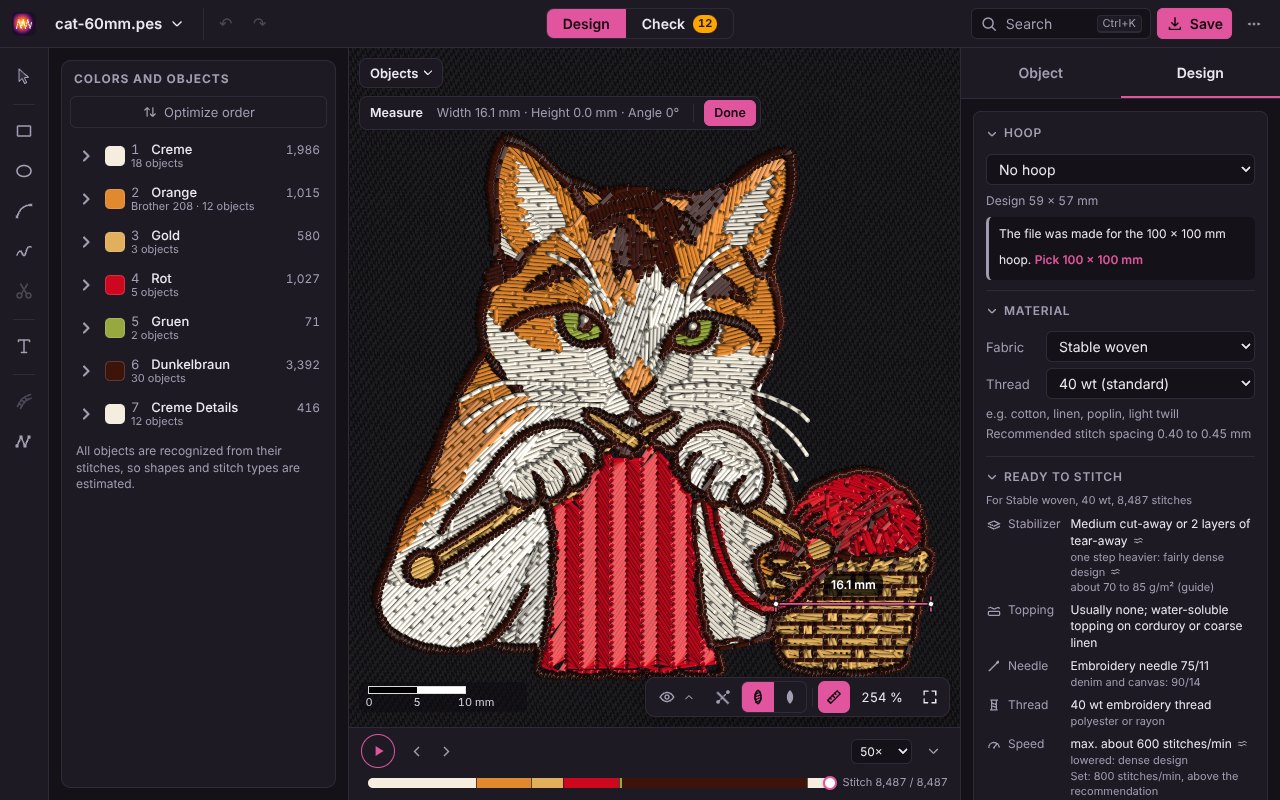
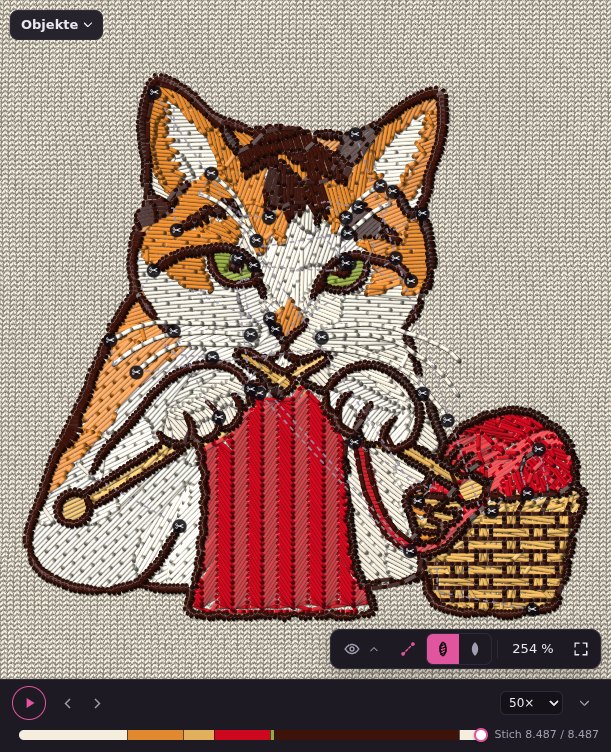
The basket is 16.1 mm wide. The scale bar at the bottom left, the ruler at the bottom right.
Hoop, material, threads
The Design tab on the right belongs to the whole design. Fabric, thread, hoop and check rules are part of every design: when you switch, its own values show, a change applies only to the active one, and a new design takes over the values used last.
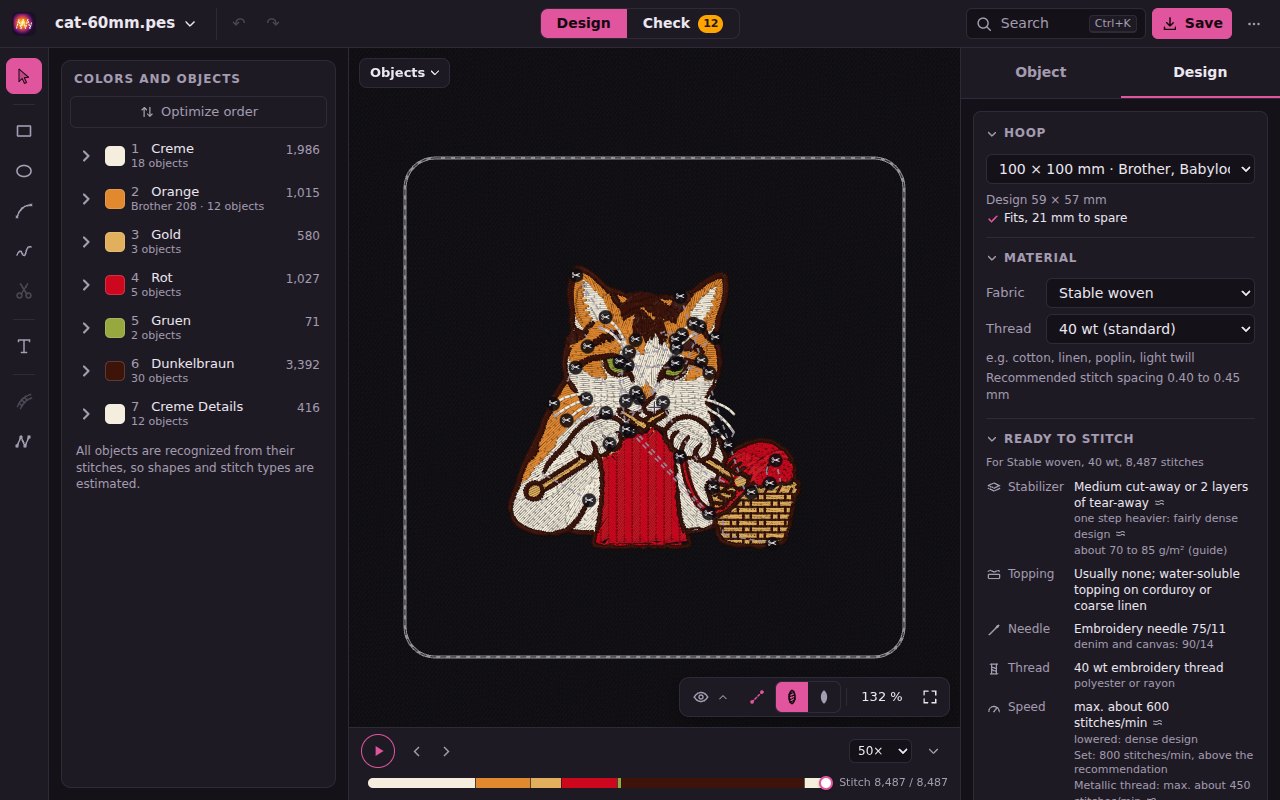
- Hoop
- Says which hoop the design will be sewn in: none, a common sewing field from 50 × 50 to 240 × 360 mm with the brands it is usual for, or Own size in mm; below, the design's size and Fits, n mm to spare. The sewing field stands as a dashed line around the design, centered, as machines center a design when loading it. If the design is too big, the line turns red, the part outside is tinted, and a note says by how much, with a larger hoop to pick and Shrink to fit, which makes the whole design smaller, evenly, until it fits with 1 mm to spare, and sews it anew (one undo step). If it only fits turned by 90°, turn it at the machine. If the file names a hoop in its header (PES from version 5, JEF), the note offers it; nothing changes until you pick it.
- Tracing image
- A picture under the design to draw along, never sewn, see Tracing image.
- Material
- Fabric (woven, denim and canvas, cap, knit, fleece, terry, light fabric, sheer fabric, leather, with examples) and Thread (60, 40, 30 or 12 wt). From them follow the recommended stitch spacing, the limits of the check and the defaults for everything you sew anew: tie stitches, underlay by size, satin stitches split from 7 mm, pull compensation. How the check works explains the rules with the numbers for this material.
- Ready to stitch
- For the chosen fabric, thread and stitch count: Stabilizer (kind and layers, about one layer of tear-away more per 10,000 stitches), Topping (water-soluble film on terry and for small lettering), Needle (kind and size), Thread, Speed (lowered for a dense design, small lettering or thick thread) and Hooping. Hooping and notes unfolds tips, say on caps without a cap frame or on small lettering. All of it is guide values from manufacturer and trade sources; ≈ marks a rule of thumb, a second sign disputed sources. A test stitch-out on a scrap remains the best check.
-
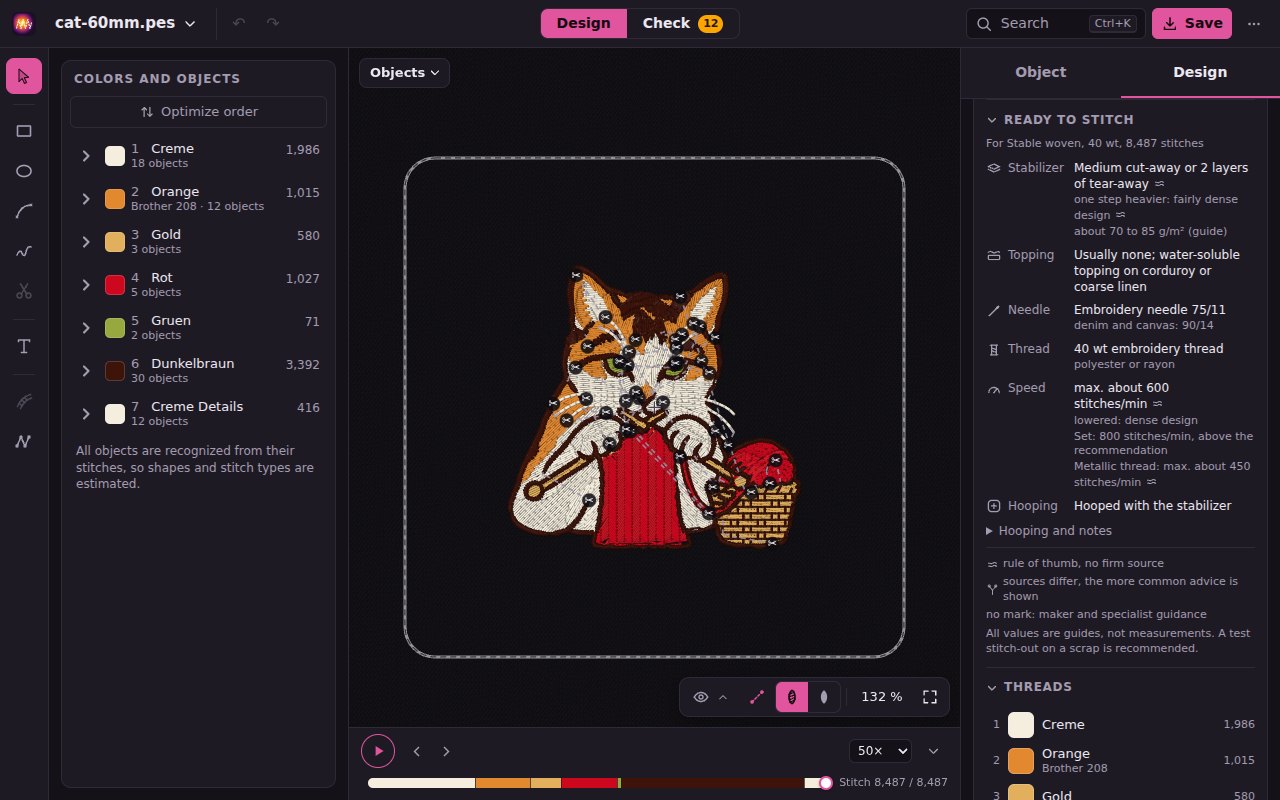
Ready to stitch for the cat on woven fabric: stabilizer, needle, thread and speed, with the sources as small marks. - Threads
- The threads of the design with brand and number and how many meters each takes, below them all thread together and, small, the bobbin thread. The estimate works as embroidery software does: per stitch the stitch length plus twice the thickness of the fabric, plus the thread ends after each trim; under satin a third of bobbin thread lies in the middle of the back. An estimate: tension and thread change it noticeably, so lay out a little more. Then the thread brand you switch to, and the color list to print, see Sequence and colors.
- Figures
- Stitches, sewing time, thread length, color changes, trims and jumps. The sewing time uses the machine speed in stitches per minute you set here, plus seconds per trim and thread change: a multi-needle machine changes in a few seconds, with One needle you change and thread by hand, rather 30 to 60 s.
Save and project
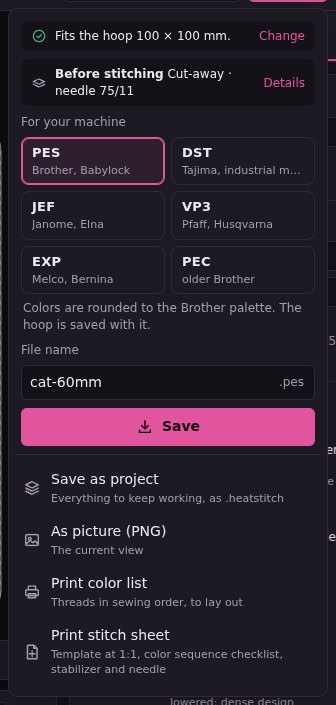
Save at the top right (Ctrl+S) opens everything that comes out of the design.
- For your machine: pick the format, named by machine brand: PES (Brother, Babylock), DST (Tajima, industrial machines), JEF (Janome, Elna), VP3 (Pfaff, Husqvarna), EXP (Melco, Bernina) or PEC (older Brother). A line under the format says what it does with colors and hoop. The choice is remembered. The file name suggests the design's name; what you type names file and design. At the top stand the hoop and whether the design fits, with Choose, and Before stitching names stabilizer and needle, Details leads to the Design card. Objects, shapes and letterings are lost in embroidery files.
- Colors: VP3 keeps them exactly, with brand and catalog number. PES and PEC use the Brother palette (colors read from a PES keep their place, others get the nearest), JEF the Janome palette. DST and EXP store no colors: assign the threads at the machine. PES names the hoop 100 × 100 or 130 × 180 mm, JEF the chosen Janome hoop.
- JEF has no trim command: the machine trims before jumps over 3 mm, a trim before a shorter move is lost. Stitches over 12.7 mm are split into equal stitches.
- Save as project (.heatstitch) saves everything you are working on in one file, named by the day (
2026-10-07-heatstitch-project.heatstitch), including what embroidery files cannot hold: all open designs with original and your changes, exact thread colors, shapes, stitch settings, rungs and guide lines of the objects, letterings as text, acknowledged findings, the picture from Convert a picture with color edits and brush strokes, the tracing images, plus material, check rules and correction options. To go on, open the file here again (drop it in or Open …); its designs join the open ones. The undo history is not saved. With several designs open, the arrow next to Save as project offers Only this design: the project then holds just the current design and is named after it. - As picture (PNG) saves the current view, in Check with a legend.
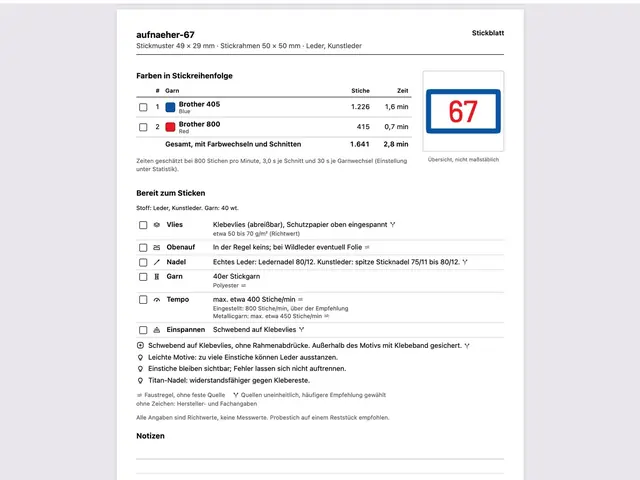
- Print color list: the threads in sewing order, to lay out. Print stitch sheet: one page with the design at 1:1 as a template, the color sequence to tick off with meters of thread, stabilizer and needle, to keep next to the machine.
- Back to the original drops all changes to a loaded design; × in the Designs menu removes it from the browser.
Shortcuts
? shows the overview in the app, Ctrl+K finds every command with its key.
| 1 / 2 / 3 | Design / Check / Convert a picture |
| Ctrl+K, ? | Search commands, show shortcuts |
| Ctrl+O, Ctrl+S | Open a file, save |
| Mouse wheel / pinch, drag | Zoom, pan |
| F or double click, + - 0 | Fit; zoom in, zoom out, actual size |
| H, S, A | All markers on or off; show stitches or shapes; auto highlight on or off |
| Shift+B | Show or hide the tracing image |
| L | Measure the distance between two points |
| J K or ↓ ↑ | Next / previous design |
| Ctrl+Z / Ctrl+Shift+Z | Undo / redo |
| Space, , ., Home End | Player: play or pause, one stitch back or forward (with Shift 100), to the start or end |
| V, M O B P | Select; rectangle, ellipse, path, freehand |
| X, T, R, G, E | Cut apart, text, direction (rungs), guide lines, stitches by hand |
| Shift / Ctrl+click, Ctrl+A | Add objects to the selection, select all |
| Arrow keys | Nudge the selected objects by 0.1 mm (with Shift 1 mm), on the Shape level the node, on the Stitches level the needle point |
| Alt+↑ ↓ | Sew earlier / later (with Shift first / last) |
| Ctrl+C, Ctrl+V | Copy the selected objects, paste them 2 mm beside |
| Ctrl+D, Del | Duplicate the selected objects exactly in place, delete the selected objects |
| Enter | Open the shape, from the shape on to the stitches; on a lettering single letters |
| Double click | Open shape or stitches; on the Shape level set a node; on the Stitches level set a needle point |
| C, Del | On the Shape level: make the node a corner or smooth, delete it |
| , ., I, Del | On the Stitches level: previous / next needle point, split the stitch, delete |
| W, Home End | On the Stitches level: stitch on (set needle points by clicking), to the start / thread end of the object |
| T | In the Direction tool: draw a rung or a cut line |
| Esc | Put the tool away, clear the selection or zone, one level back |
| N / Shift+N, V | Check: next / previous zone, markers on or off |
| C | Check: compare with original |
Limits
- The limits come from digitizing guidelines and synthetic test setups, not yet from real test stitch-outs. They are a well-founded hint, not a guarantee. A test stitch-out on the real material remains the best check. The same goes for stabilizer, needle and speed under Ready to stitch.
- Objects from foreign embroidery files are recognized from the stitches. Mostly that is right; where the card shows a shape as approximate, check the orange outline before you sew anew.
- PES: the thread list of versions 5 to 10 is read; version 1 with the Brother palette is written. Further formats like XXX, HUS or U01 are not read yet.
- Photos are sewn as flat color areas, not with shading from varying density.
- heatstitch can be installed as an app and works offline after the first visit. On the desktop it opens embroidery files directly. When there is a new version, a small note offers to reload; open designs are kept.
Terms
- Design, embroidery file
- The design is what the machine sews, as a whole. The embroidery file is the file for it (PES, DST and so on); a project (.heatstitch) can hold several designs.
- Design, Check
- The two pages of the app: Design shows and changes the design, Check judges it for the fabric and fixes what will not work.
- Color, thread
- A color is a section of the sequence with everything sewn in one thread. The thread is the material in its color.
- Object, part
- Something sewn as one unit: a fill with its underlay, a satin or a line. Its parts are the pieces between two trims.
- Shape, outline
- The shape is the area or line an object is sewn from; the outline is its edge with nodes and handles.
- Level
- What a click on the stage acts on: objects, shape or stitches. The breadcrumb at the top left shows it.
- Stitch type, settings
- How an object is sewn: fill, satin or line, with pattern, spacing, underlay and so on.
- Stitch, needle point
- A stitch goes from one needle point to the next; the needle point is where the needle goes through the fabric.
- Jump, trim
- A jump is a move without sewing; a trim cuts the thread before it, with tie stitches before and after.
- Underlay, edge run
- Loose stitches sewn before an object that hold the fabric: across or crossed under fills, as center walk, edge run (just inside the edges) or zigzag under satin.
- Border, contour fill
- A border is the line around a fill, sewn after it. The contour fill is a fill pattern that runs the rows along the outline.
- Rung, cut line, guide line
- Rungs set the stitch direction of a satin column, cut lines split it into sections, guide lines lead the rows of a fill.
- Leave out, guide
- Leaving out drops a lower fill where a later one covers it. A guide is a shape that only serves for aligning and is never sewn.
- Zone, finding
- A zone is a connected spot where the check found something; the finding says what, and how bad.
More on rules, formats and the code: README on GitHub